The Super Admin Guide
You own the school. This guide takes you from creating your account to a fully configured academy that your Admin team, teachers, students and parents can use every day. Follow the sections in order — the setup sequence matters.
Your role at a glance
Spoteca has six account types. As Super Admin you hold the keys: school-level settings, curriculum, pricing, admin accounts, billing and analytics. Day-to-day operations (enrolling, scheduling, collecting payments) live in the Admin view — which you can also access at any time.
| Role | Who it's for | What they can do |
|---|---|---|
| 👑 Super Admin | School owner / director | Everything: curriculum, pricing plans, school settings, admin accounts, billing, analytics, import/export, audit log — plus the full Admin view. |
| 🗂️ Admin | Front-desk / operations staff | Teachers, students, enrollments, schedule, rooms, payments, attendance, messages, announcements. Cannot change school-level settings. |
| 🎹 Teacher | Your instructors | Own schedule & availability, their students, lesson notes, curriculum progress tracking, their pay summary. |
| 🎓 Student | Learners | Their schedule, journey/progress, attendance, payments, notes and messages. |
| 👨👩👧 Guardian | Parents | A dedicated portal tracking their child: schedule, attendance, journey, payments, messaging the school. |
| 🛠️ Platform Admin | Spoteca staff | Platform-level support (not part of your school). |
1 · Create your school
Go to spoteca.com/signup. Signup takes two short steps and about two minutes. No credit card is required.
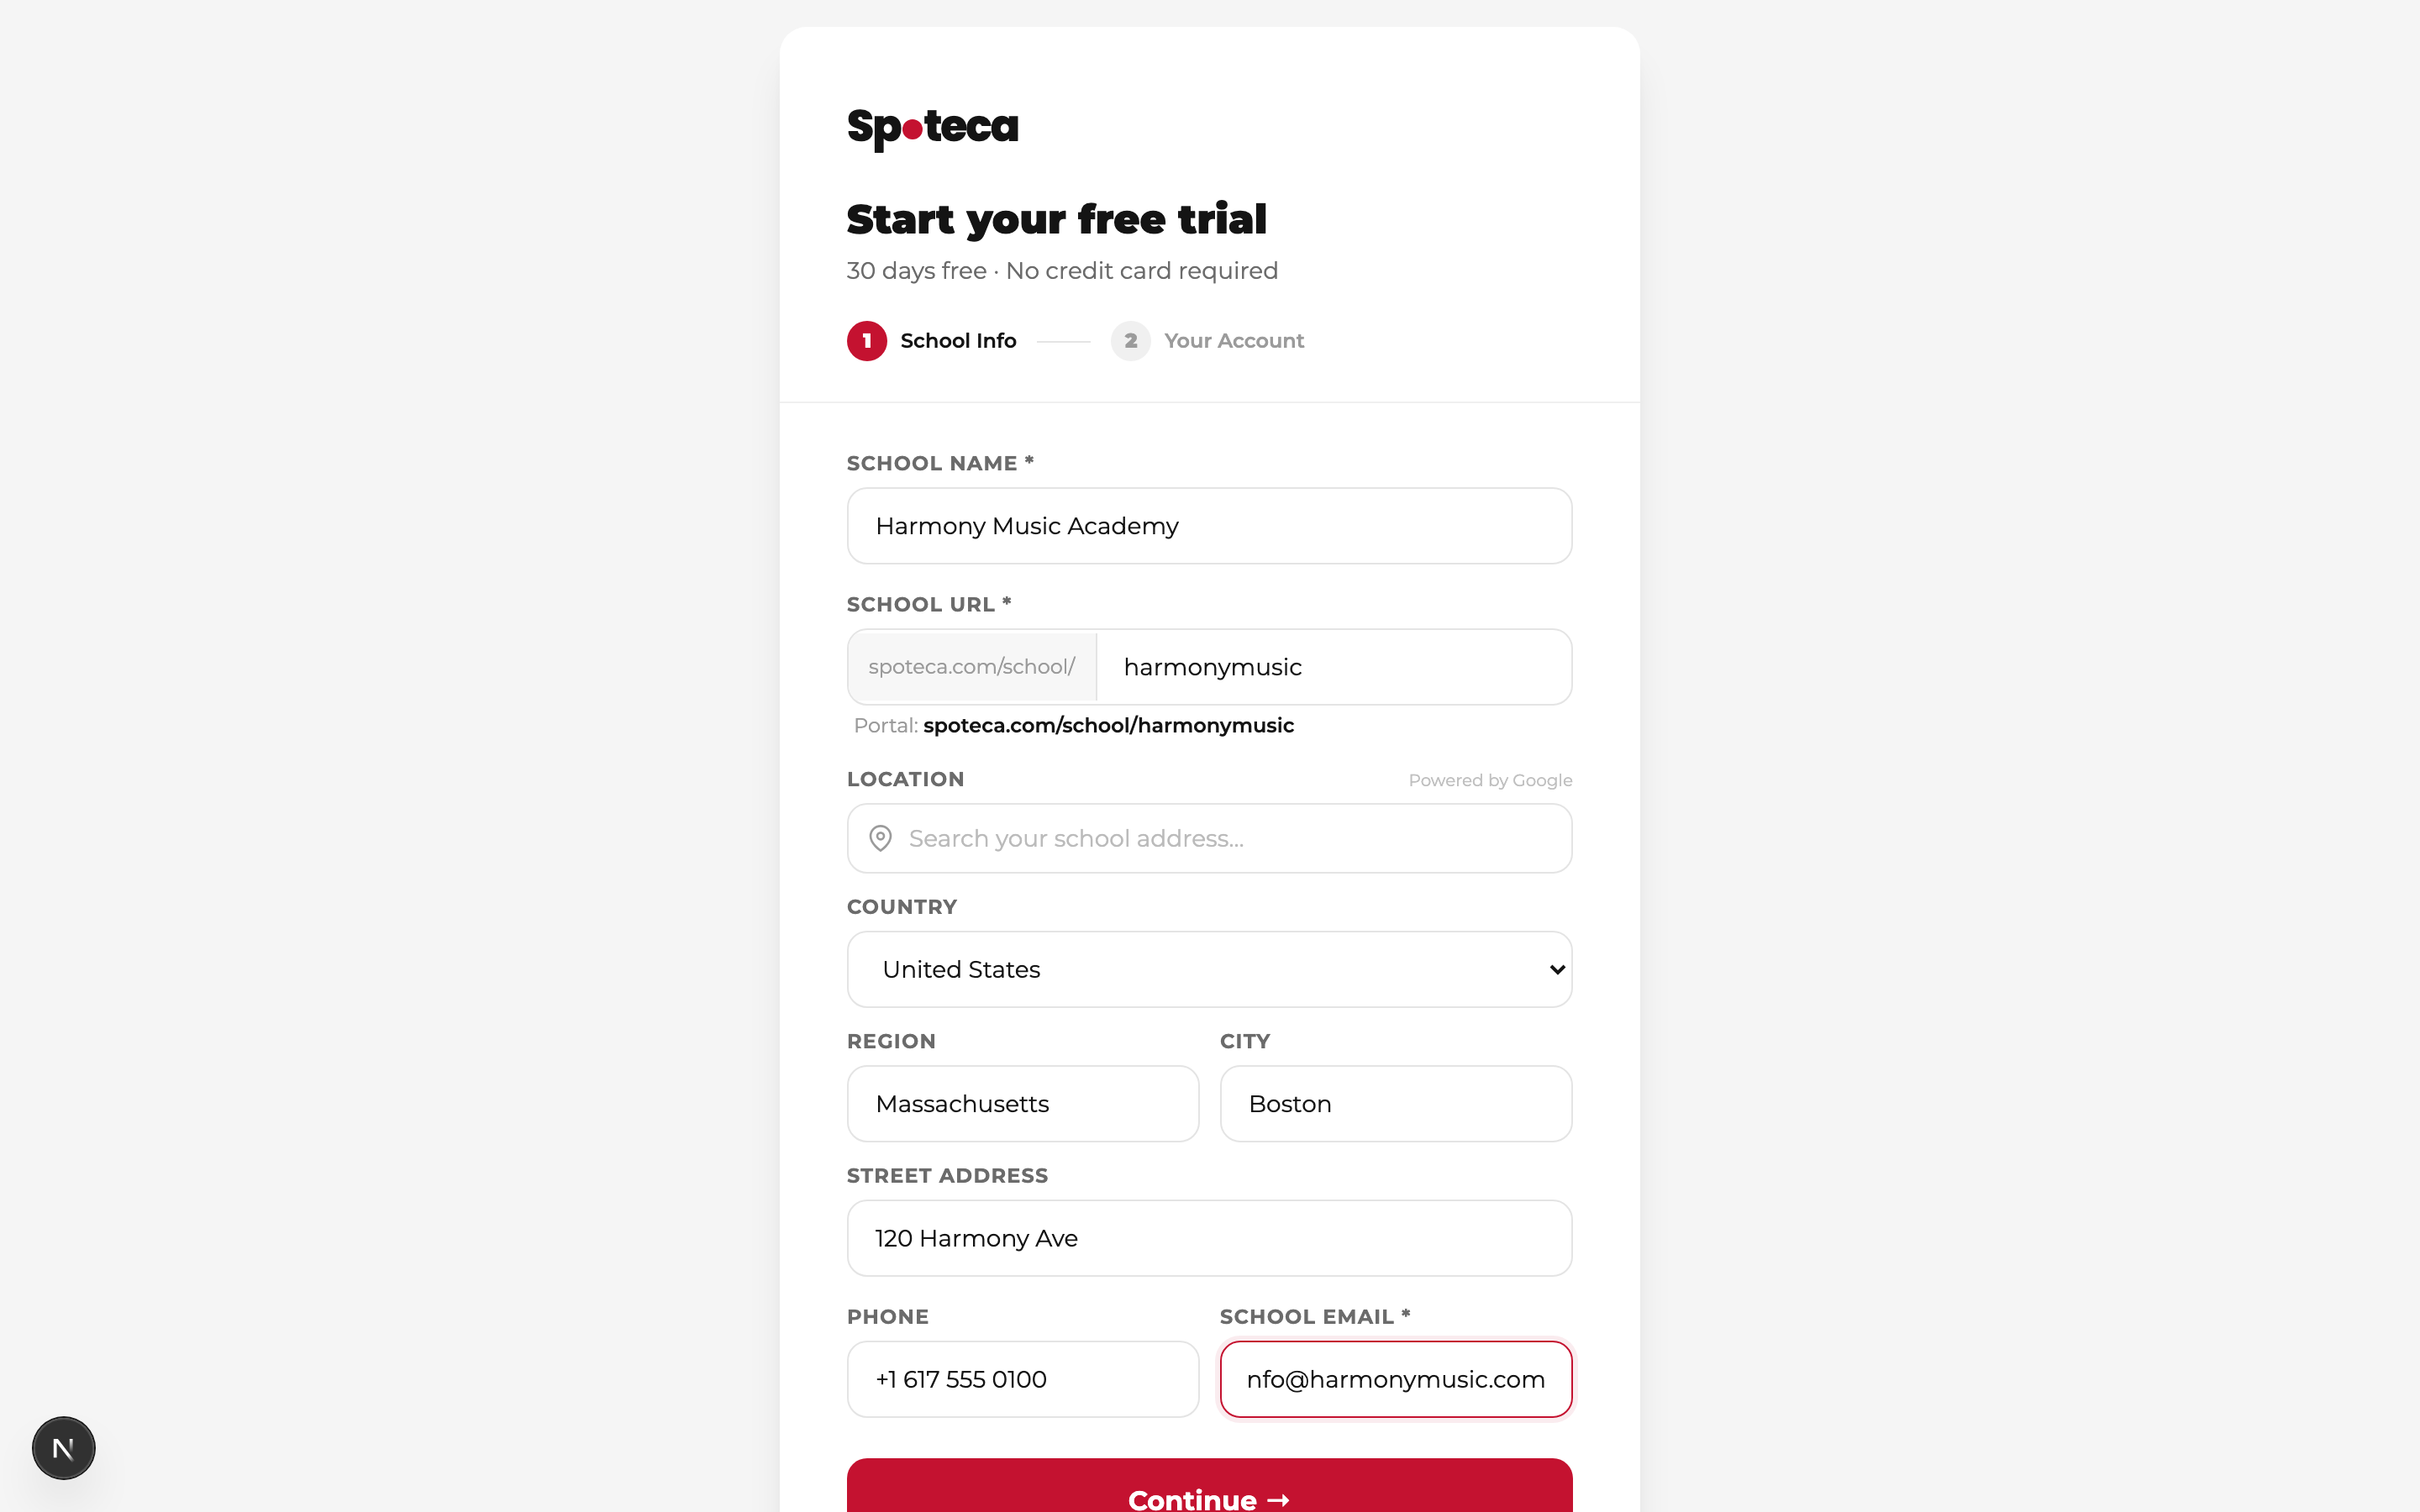
Step 1 — School info
School Name — your academy's public name (e.g. Harmony Music Academy).
School URL — auto-generated from the name; this becomes your private portal address: spoteca.com/school/yourname. Keep it short — it's what your teachers, students and parents will use to log in. You can edit it before submitting.
Location & contact — address (with Google search assist), country, region, city, phone, and the school email (required — used for billing and important notices).
Step 2 — Your owner account
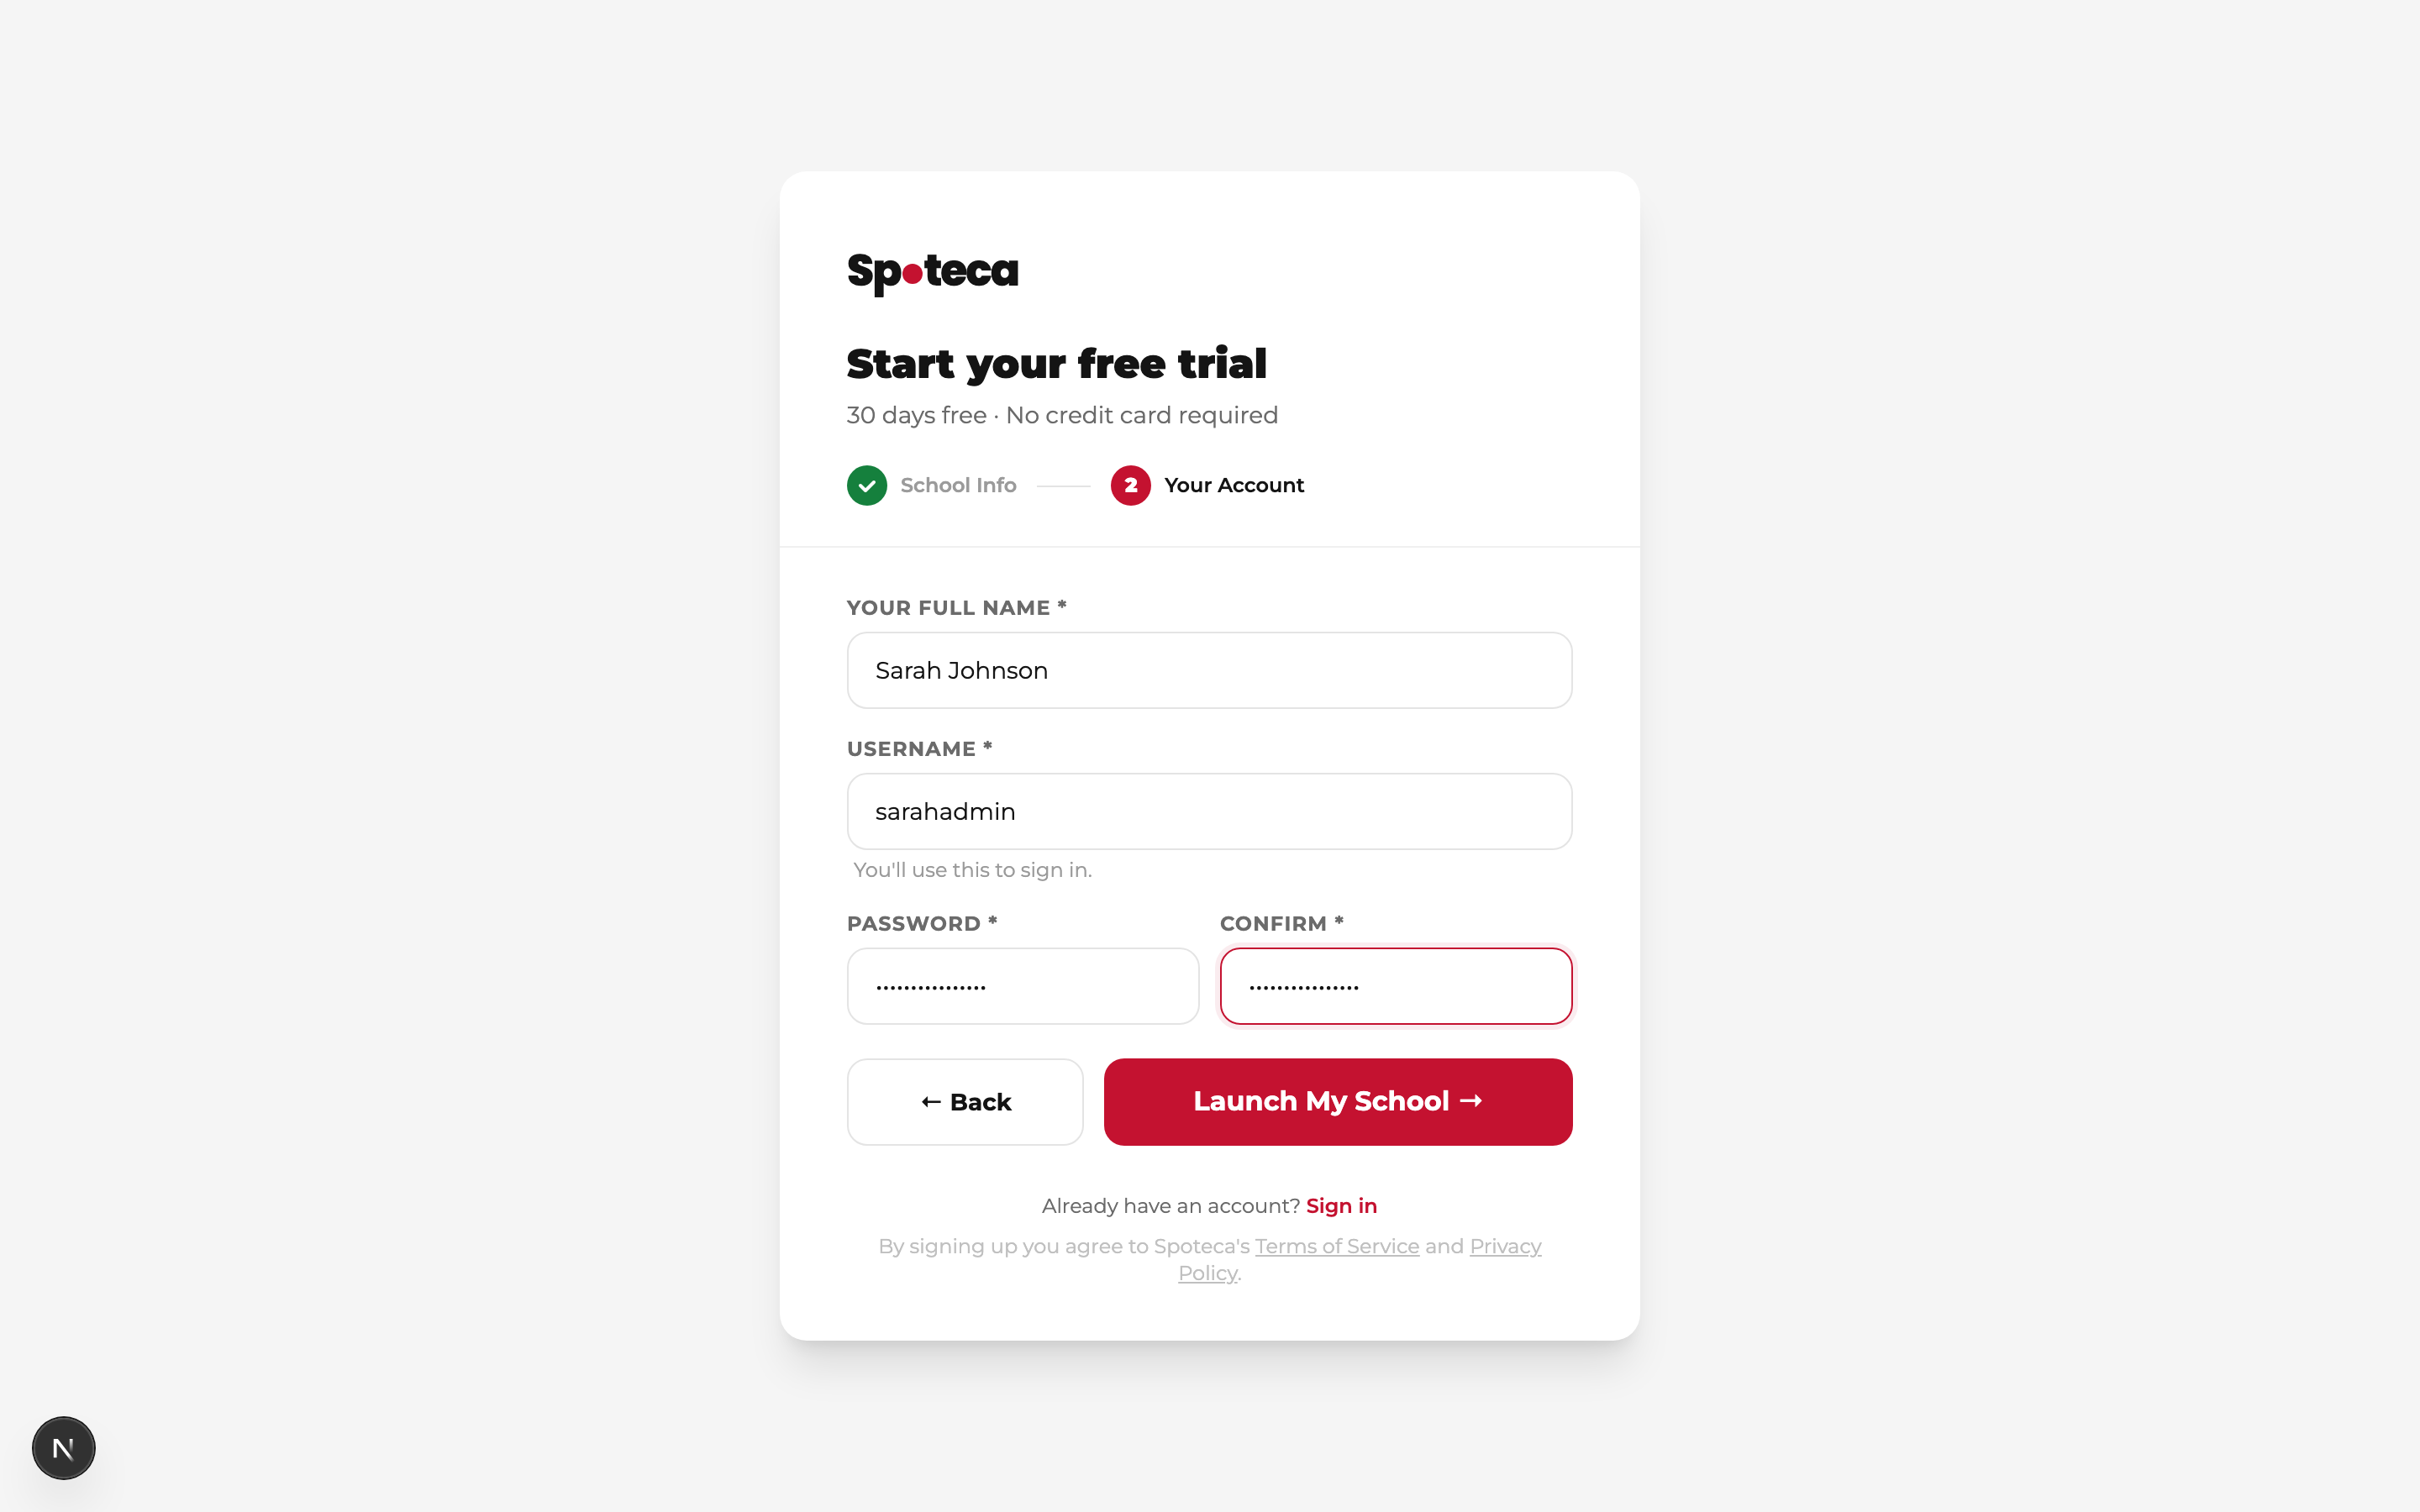
Your full name, a username (this is what you'll sign in with — not your email), and a password (min. 8 characters). Click Launch My School → and you're signed in automatically, landing on your Super Admin dashboard.
2 · Finish setting up your school
The moment signup drops you on your dashboard, a setup wizard opens by itself. It is the shortest route from an empty school to one that can actually enrol a student, and it asks for exactly four things.
Everything happens inside the wizard. Each step shows the real form — the same plan builder, subject list, teacher form and availability grid you'd find in the menus — so you are never sent off to another screen and left to find your way back.
The first screen explains before it asks
The wizard opens on an explanation, not a form: "Four steps for your school to be ready", with the four steps drawn out 1‑2‑3‑4 and roughly how long each takes. There is nothing to fill in — read it, then press Start with subjects.
It exists because owners used to land straight on "create a pricing plan" with no idea why that was first, and quite a few closed the tab there.
- Language — what everyone at your school sees. Each person can still switch their own from their top bar.
- Currency — what every price, invoice and receipt is shown in.
- Time zone — where the school is, not where you happen to be sitting. See Section 5 for exactly what it changes.
The order is a dependency chain, not a ranking
You cannot reshuffle these. Each step exists because the next one is impossible without it:
| # | Step | Why it can't be skipped |
|---|---|---|
| 1 | Subjects | Your list starts empty, and adding a teacher asks which subjects they teach. Until this is filled in there is literally nothing to pick. |
| 2 | Pricing plan | Nothing can be enrolled without one. Plans decide what each family is invoiced and what each teacher is paid — Spoteca generates both automatically. |
| 3 | First teacher | Every lesson belongs to a teacher. They get their own login and their own schedule. |
| 4 | Teacher availability | The scheduler only offers slots a teacher is free for. Without this, enrolment shows an empty slot list. |
List the subjects you teach
Piano, guitar, ballet, karate — whatever your school offers. Type each one and press its Save; this list is what the teacher form, enrolment and the waiting list all read from.
Create a pricing plan
The full plan builder, rendered inline. One plan is enough to start — you can add the rest later from School Settings → Pricing Plans. For what every billing model means, see Section 4.
Add your first teacher
Name, username and password, phone, photo and the subjects they teach. Their pay is worked out from whichever plan each student is on, so you don't set a per-lesson rate here unless the teacher is on a salary.
Teaching the lessons yourself? You don't need a second account or a second email address — Spoteca can attach a teacher profile to your own owner account — see section 8.
Make your teachers bookable
This step paints one teacher's week, not the school's opening hours. The teachers you created are listed with the hours each already has; pick one and their weekly grid opens, exactly as it does under Admin → Teachers → Availability. Drag across the grid to paint when they can be booked, then Save, then go back and do the next one.
This is the step that actually makes your school bookable. The timetable only ever reads a teacher's own availability, so until at least one teacher has hours, enrolment will offer no slots at all.

Moving around, closing and coming back
The progress bar at the top is clickable: you can jump straight to any step rather than walking through them in order. Back and Next do the obvious, and the last step ends with Finish.
There are three ways out, and they are not the same:
| You press | What happens next time you open your dashboard |
|---|---|
| ✕ or a click outside | The wizard opens by itself again. Use this when you're coming straight back. |
| Skip for now | It stops opening by itself. Your dashboard shows a card instead — "Finish setting up your school — 2 of 4 done" — and Continue picks up where you left off. |
| Finish on the last step | The same card, recorded as finished. Note that it records how many steps were actually done, so pressing Finish early is honest about it. |
Nothing you have already saved is lost by any of them.
3 · Your dashboard
Your dashboard shows live counters (students, teachers, admins, enrollments, revenue, unpaid payments), your plan status, and recent activity. Need a hand with anything? Tap the ? button (bottom corner of every page) and choose Ask AI for answers about your own school, or follow this guide.
Click Skip for now any time. It becomes a Finish setting up your school card at the top of this dashboard, and you can pick up where you left off. Once all four steps are done and you click Finish, it disappears for good.
Every step renders the real form inline — the same subject list, plan builder, teacher form and availability grid described later in this guide, not a simplified copy. The last step opens each teacher's own weekly grid, because teacher availability is the only thing the scheduler reads; the rule that traps most new schools is covered in full under School Settings and Switch to the Admin view.
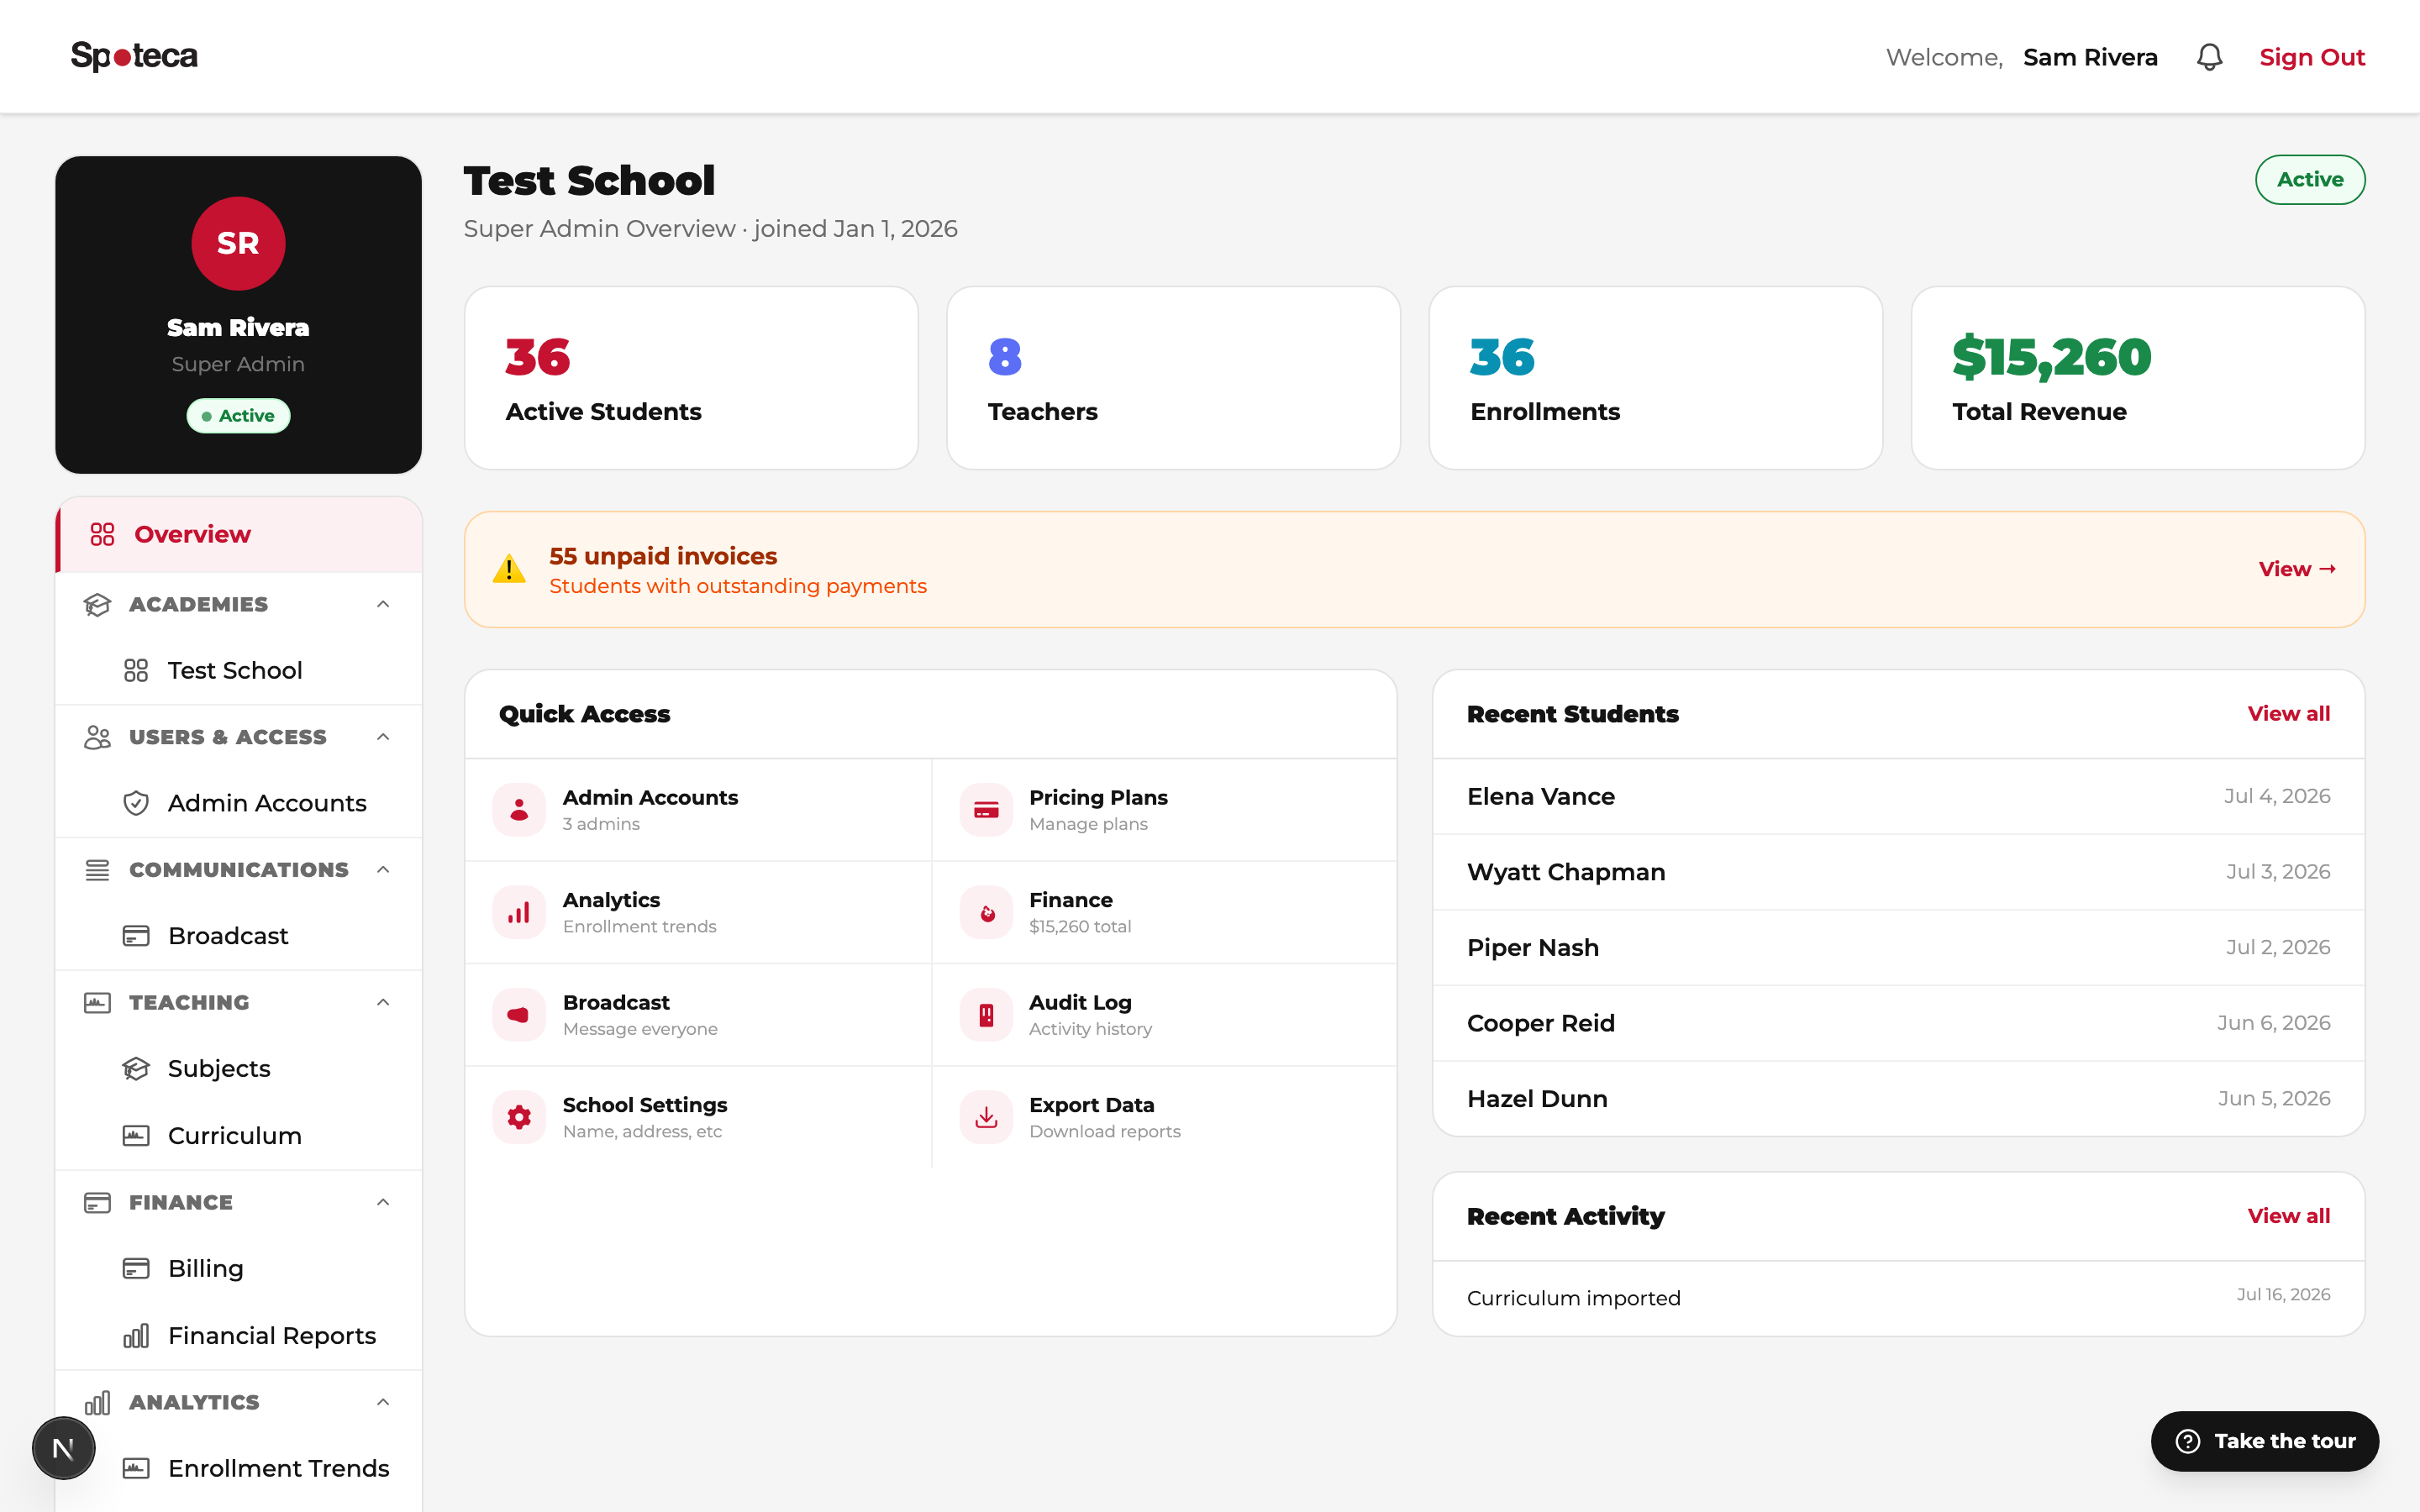
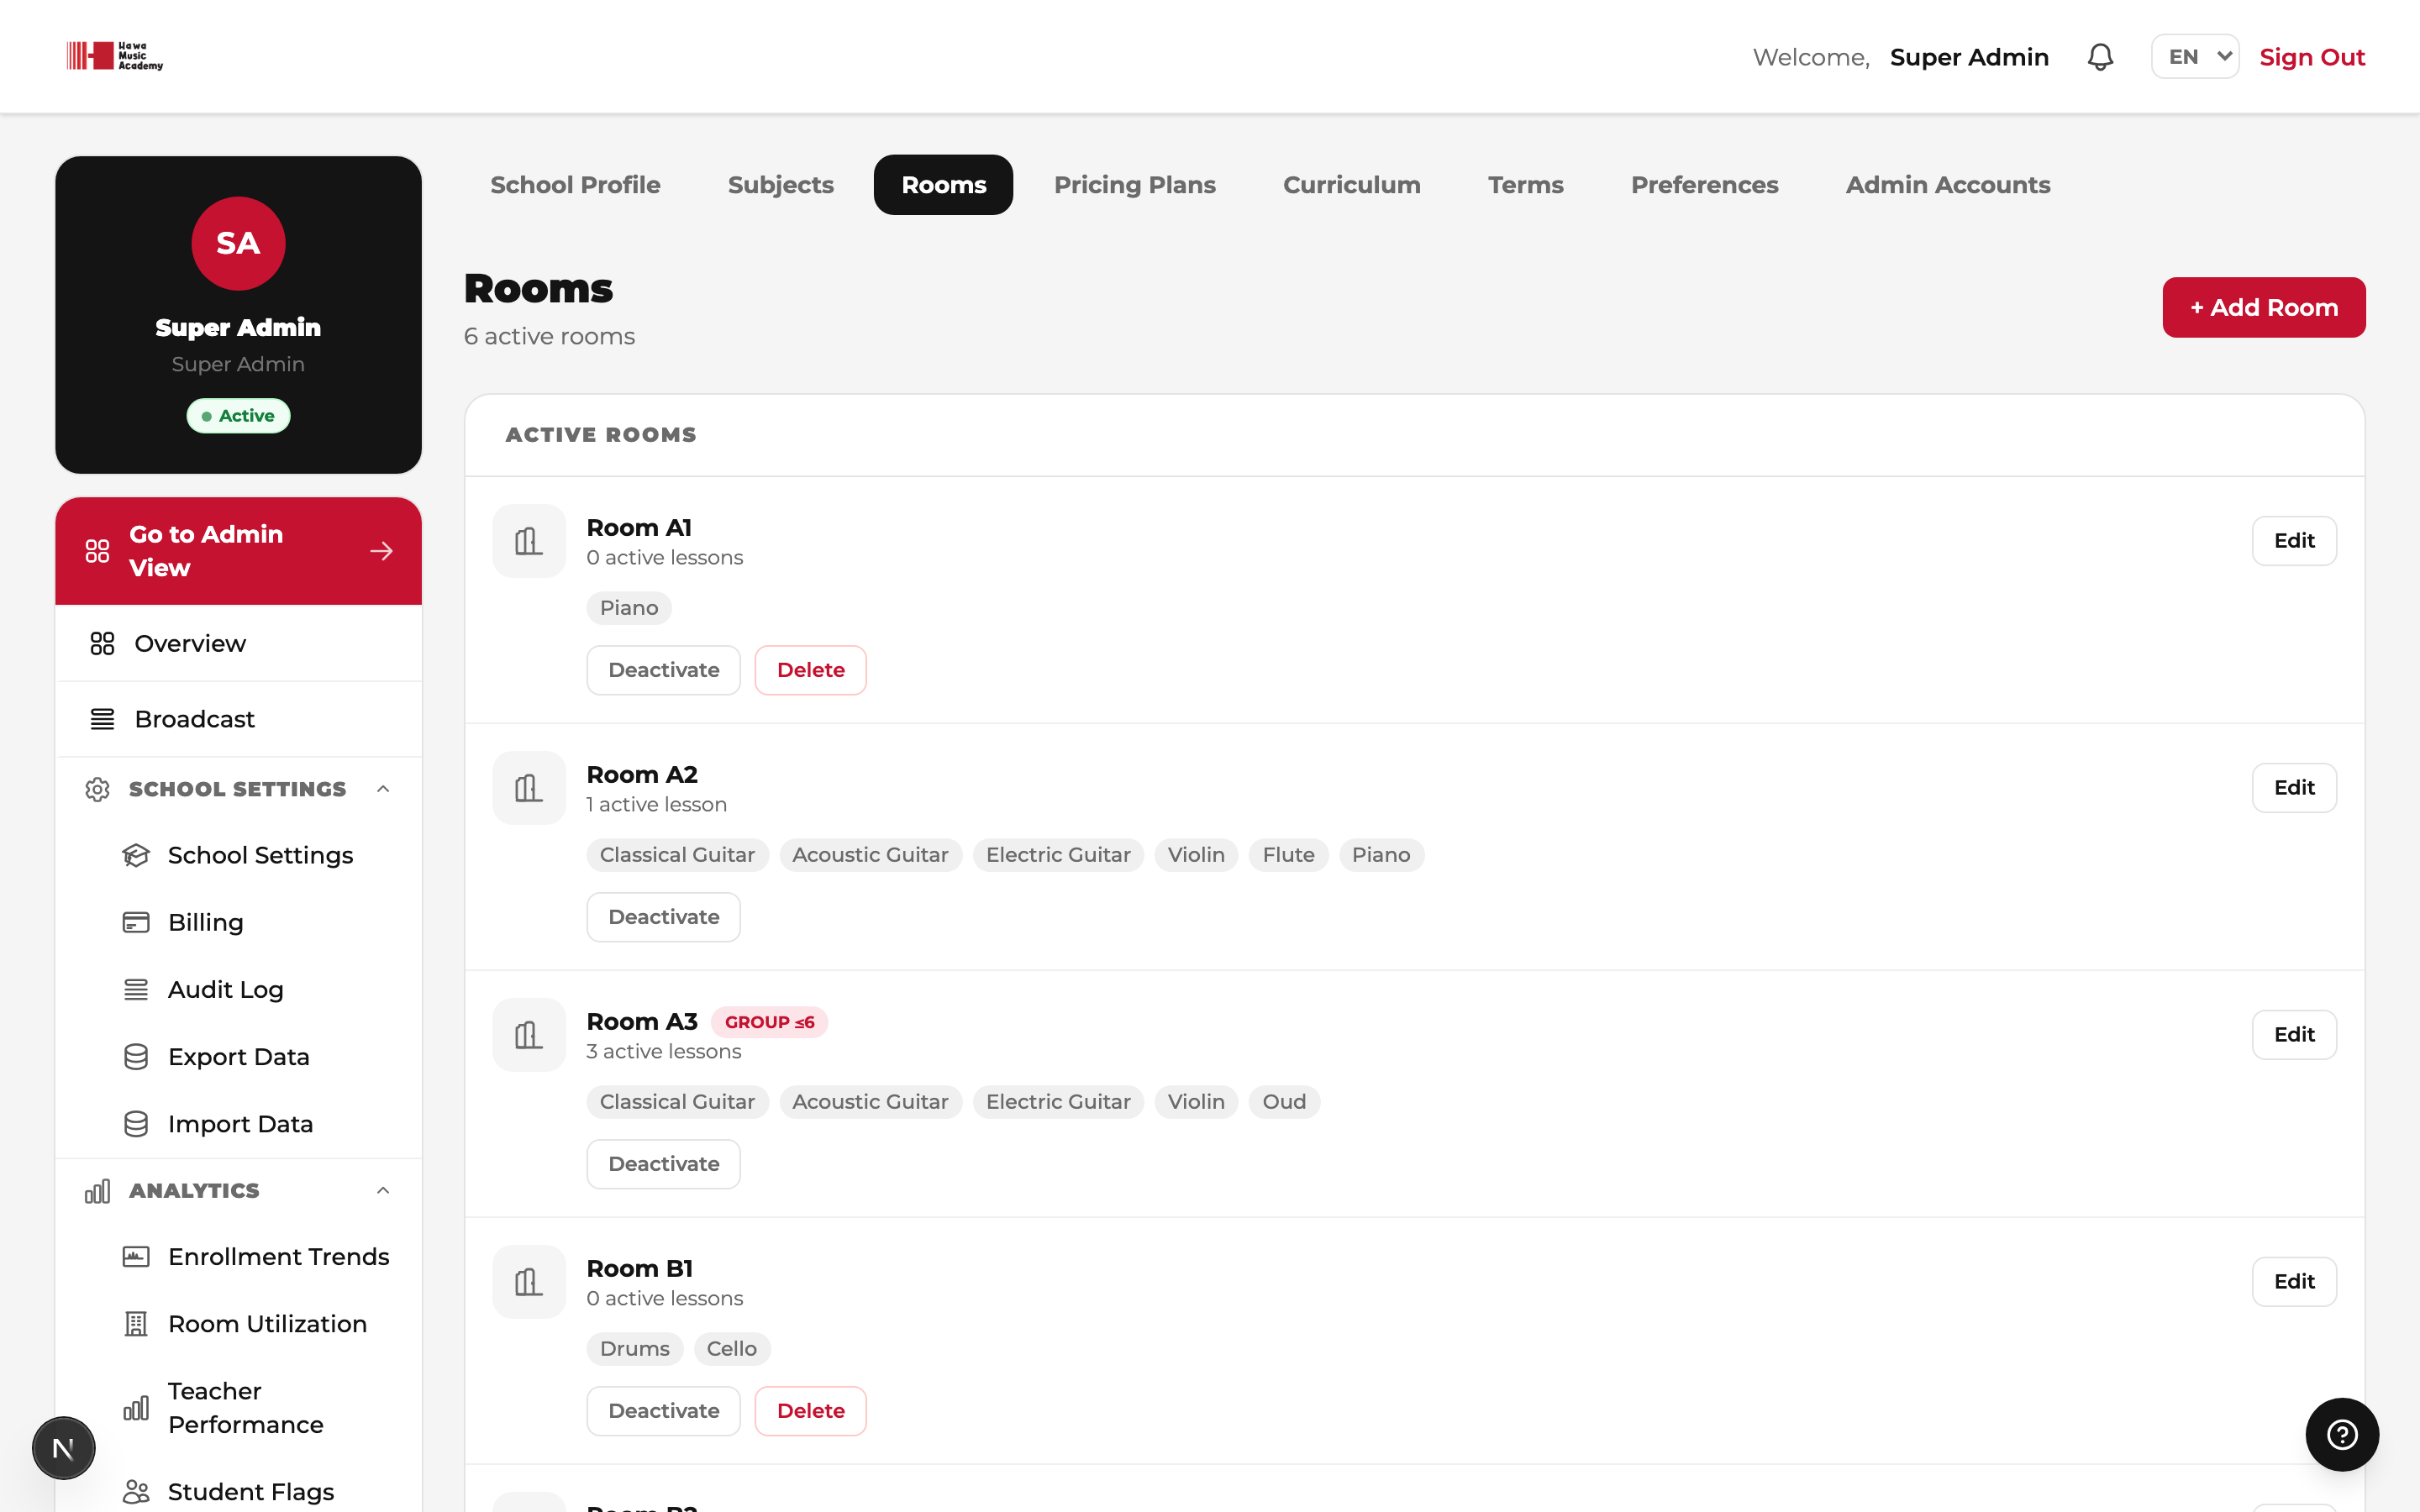
The sidebar starts with three pinned links: Go to Admin View (the colored button at the very top — jumps straight into your Admin dashboard), Overview, and Broadcast. Below them sit two groups. School Settings holds My account, School Settings (a tabbed page — see below), Billing, Audit Log, Export Data and Import Data. Analytics holds Enrollment Trends, Room Utilization, Teacher Performance, Student Flags, Financial Reports and Ask AI Questions.
The School Settings page itself is a set of tabs that gather everything about how your school is set up in one place: School Profile · Pricing Plans · Closed Days · Terms · Preferences · Subjects · Rooms · Curriculum · Admin Accounts · School Hours. Wherever this guide says "School Settings → Tab", it means one of these tabs.
4 · Create pricing plans
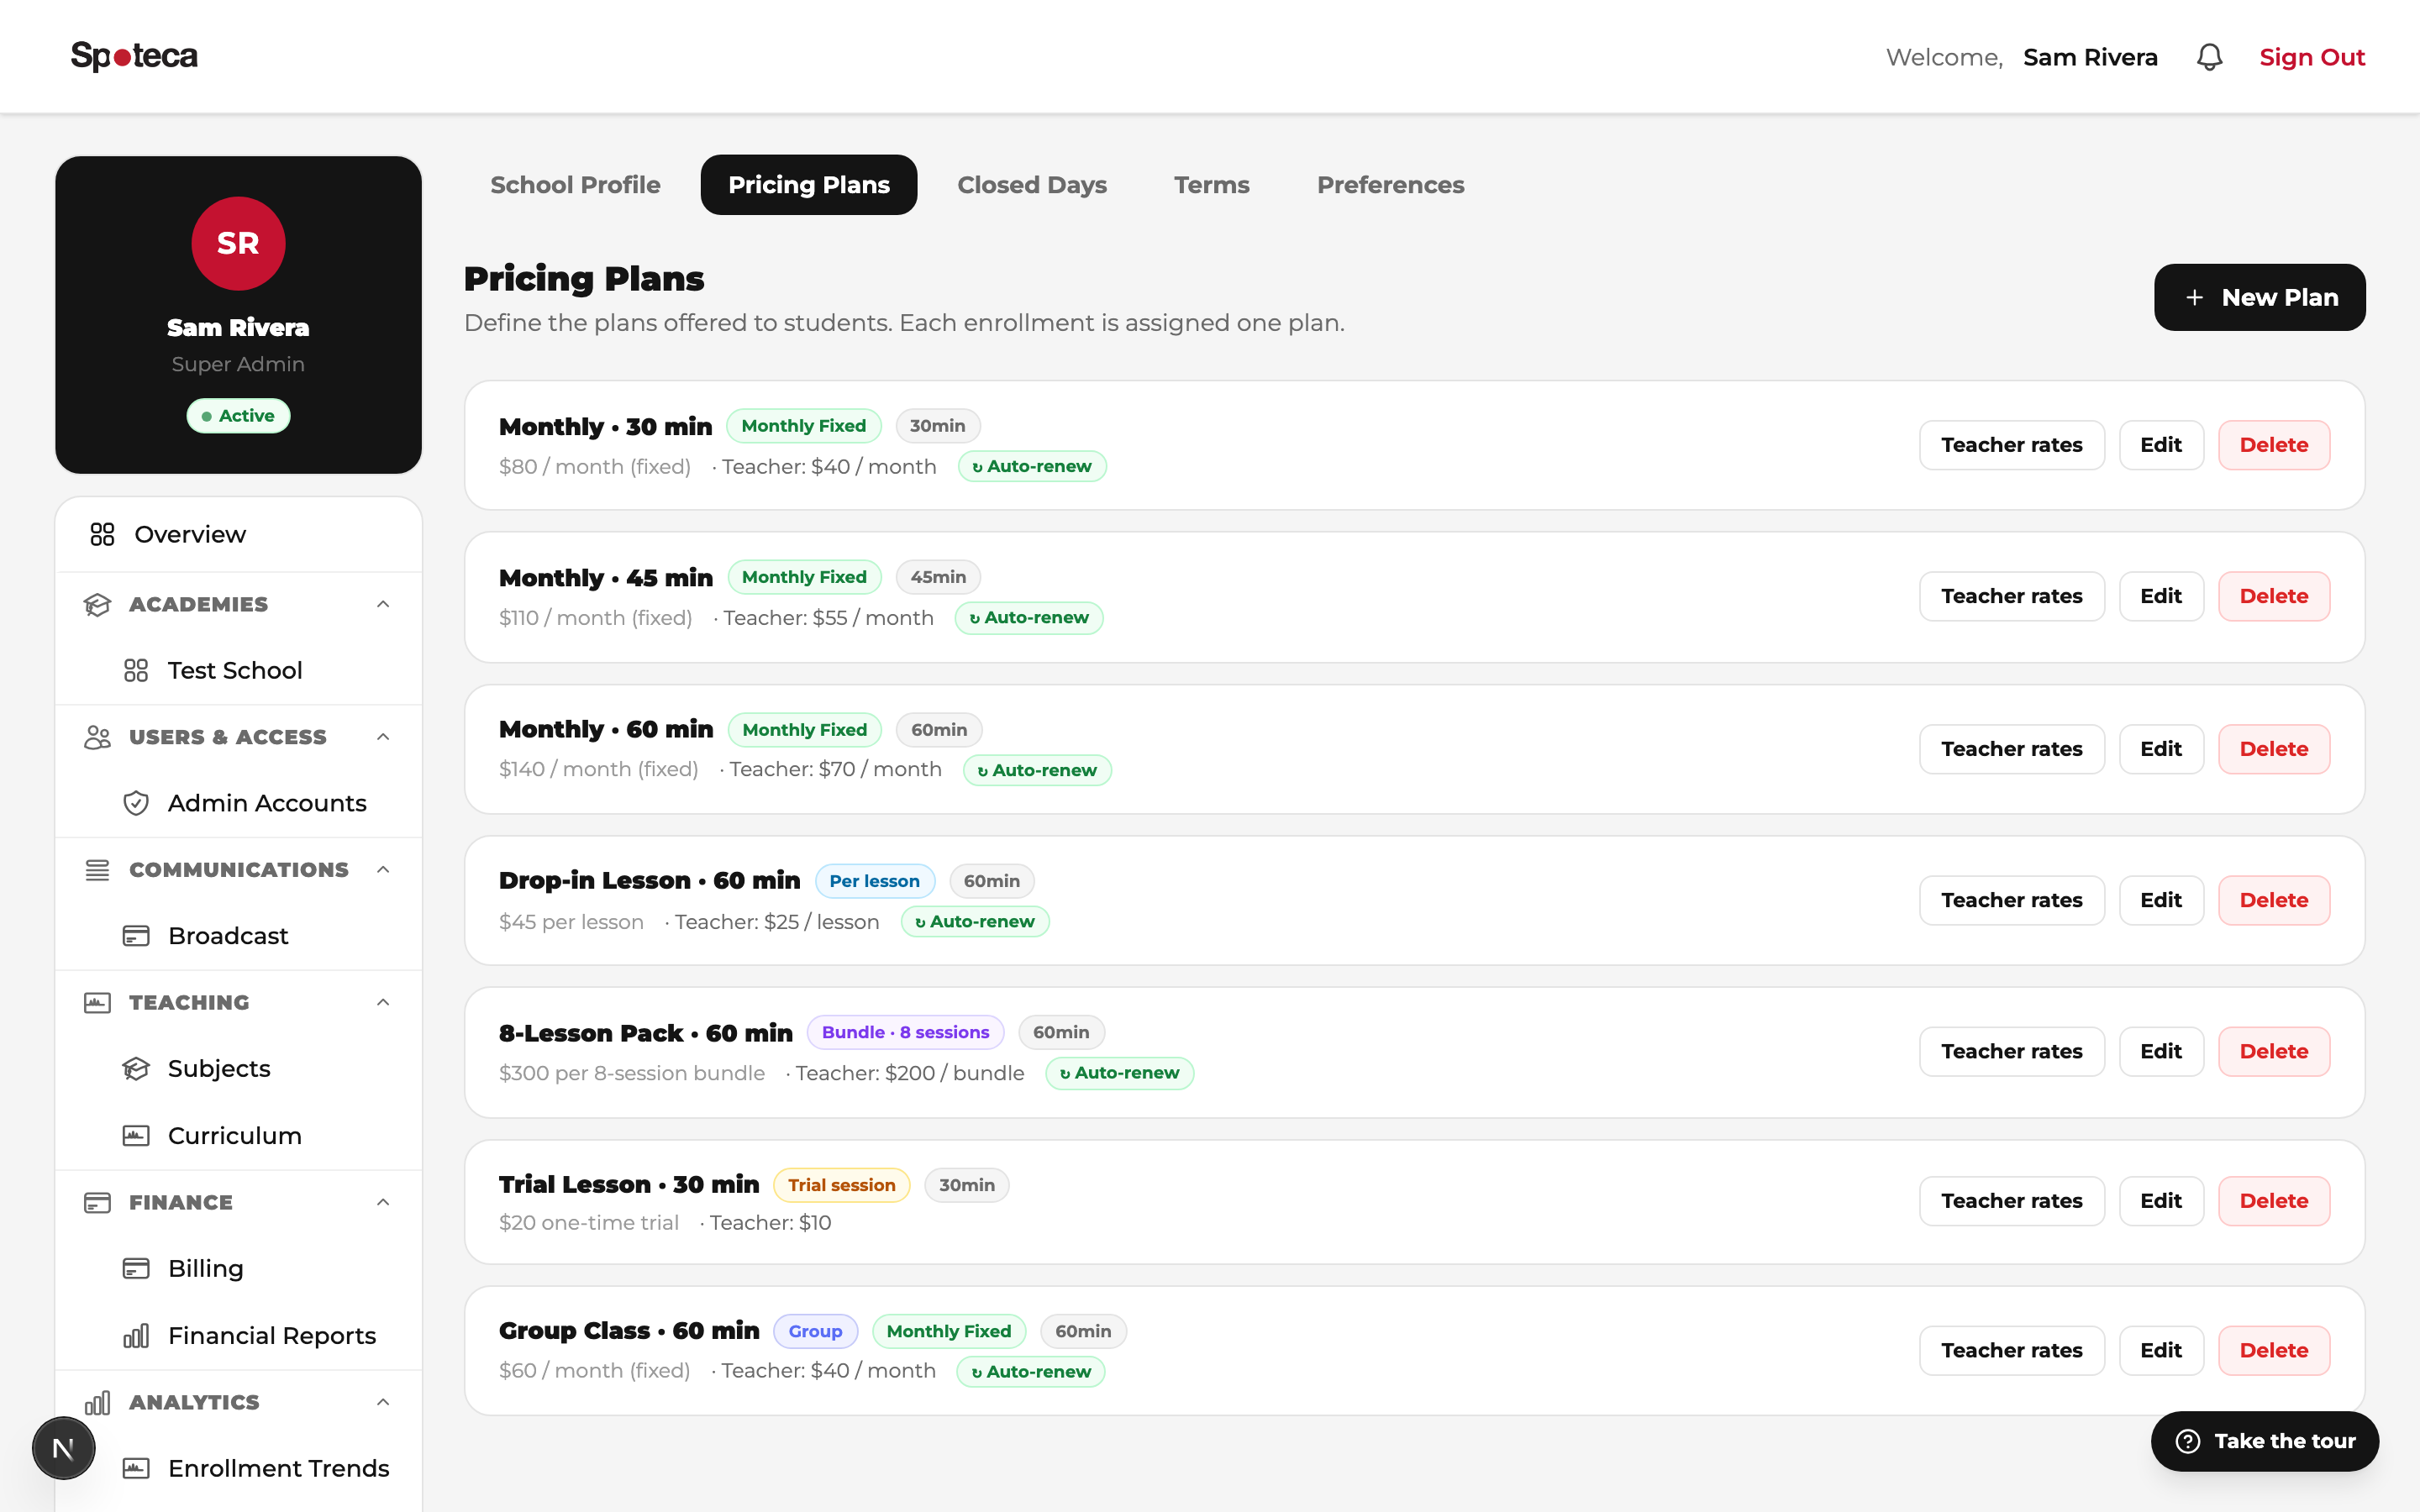
Sidebar → School Settings → Pricing Plans tab
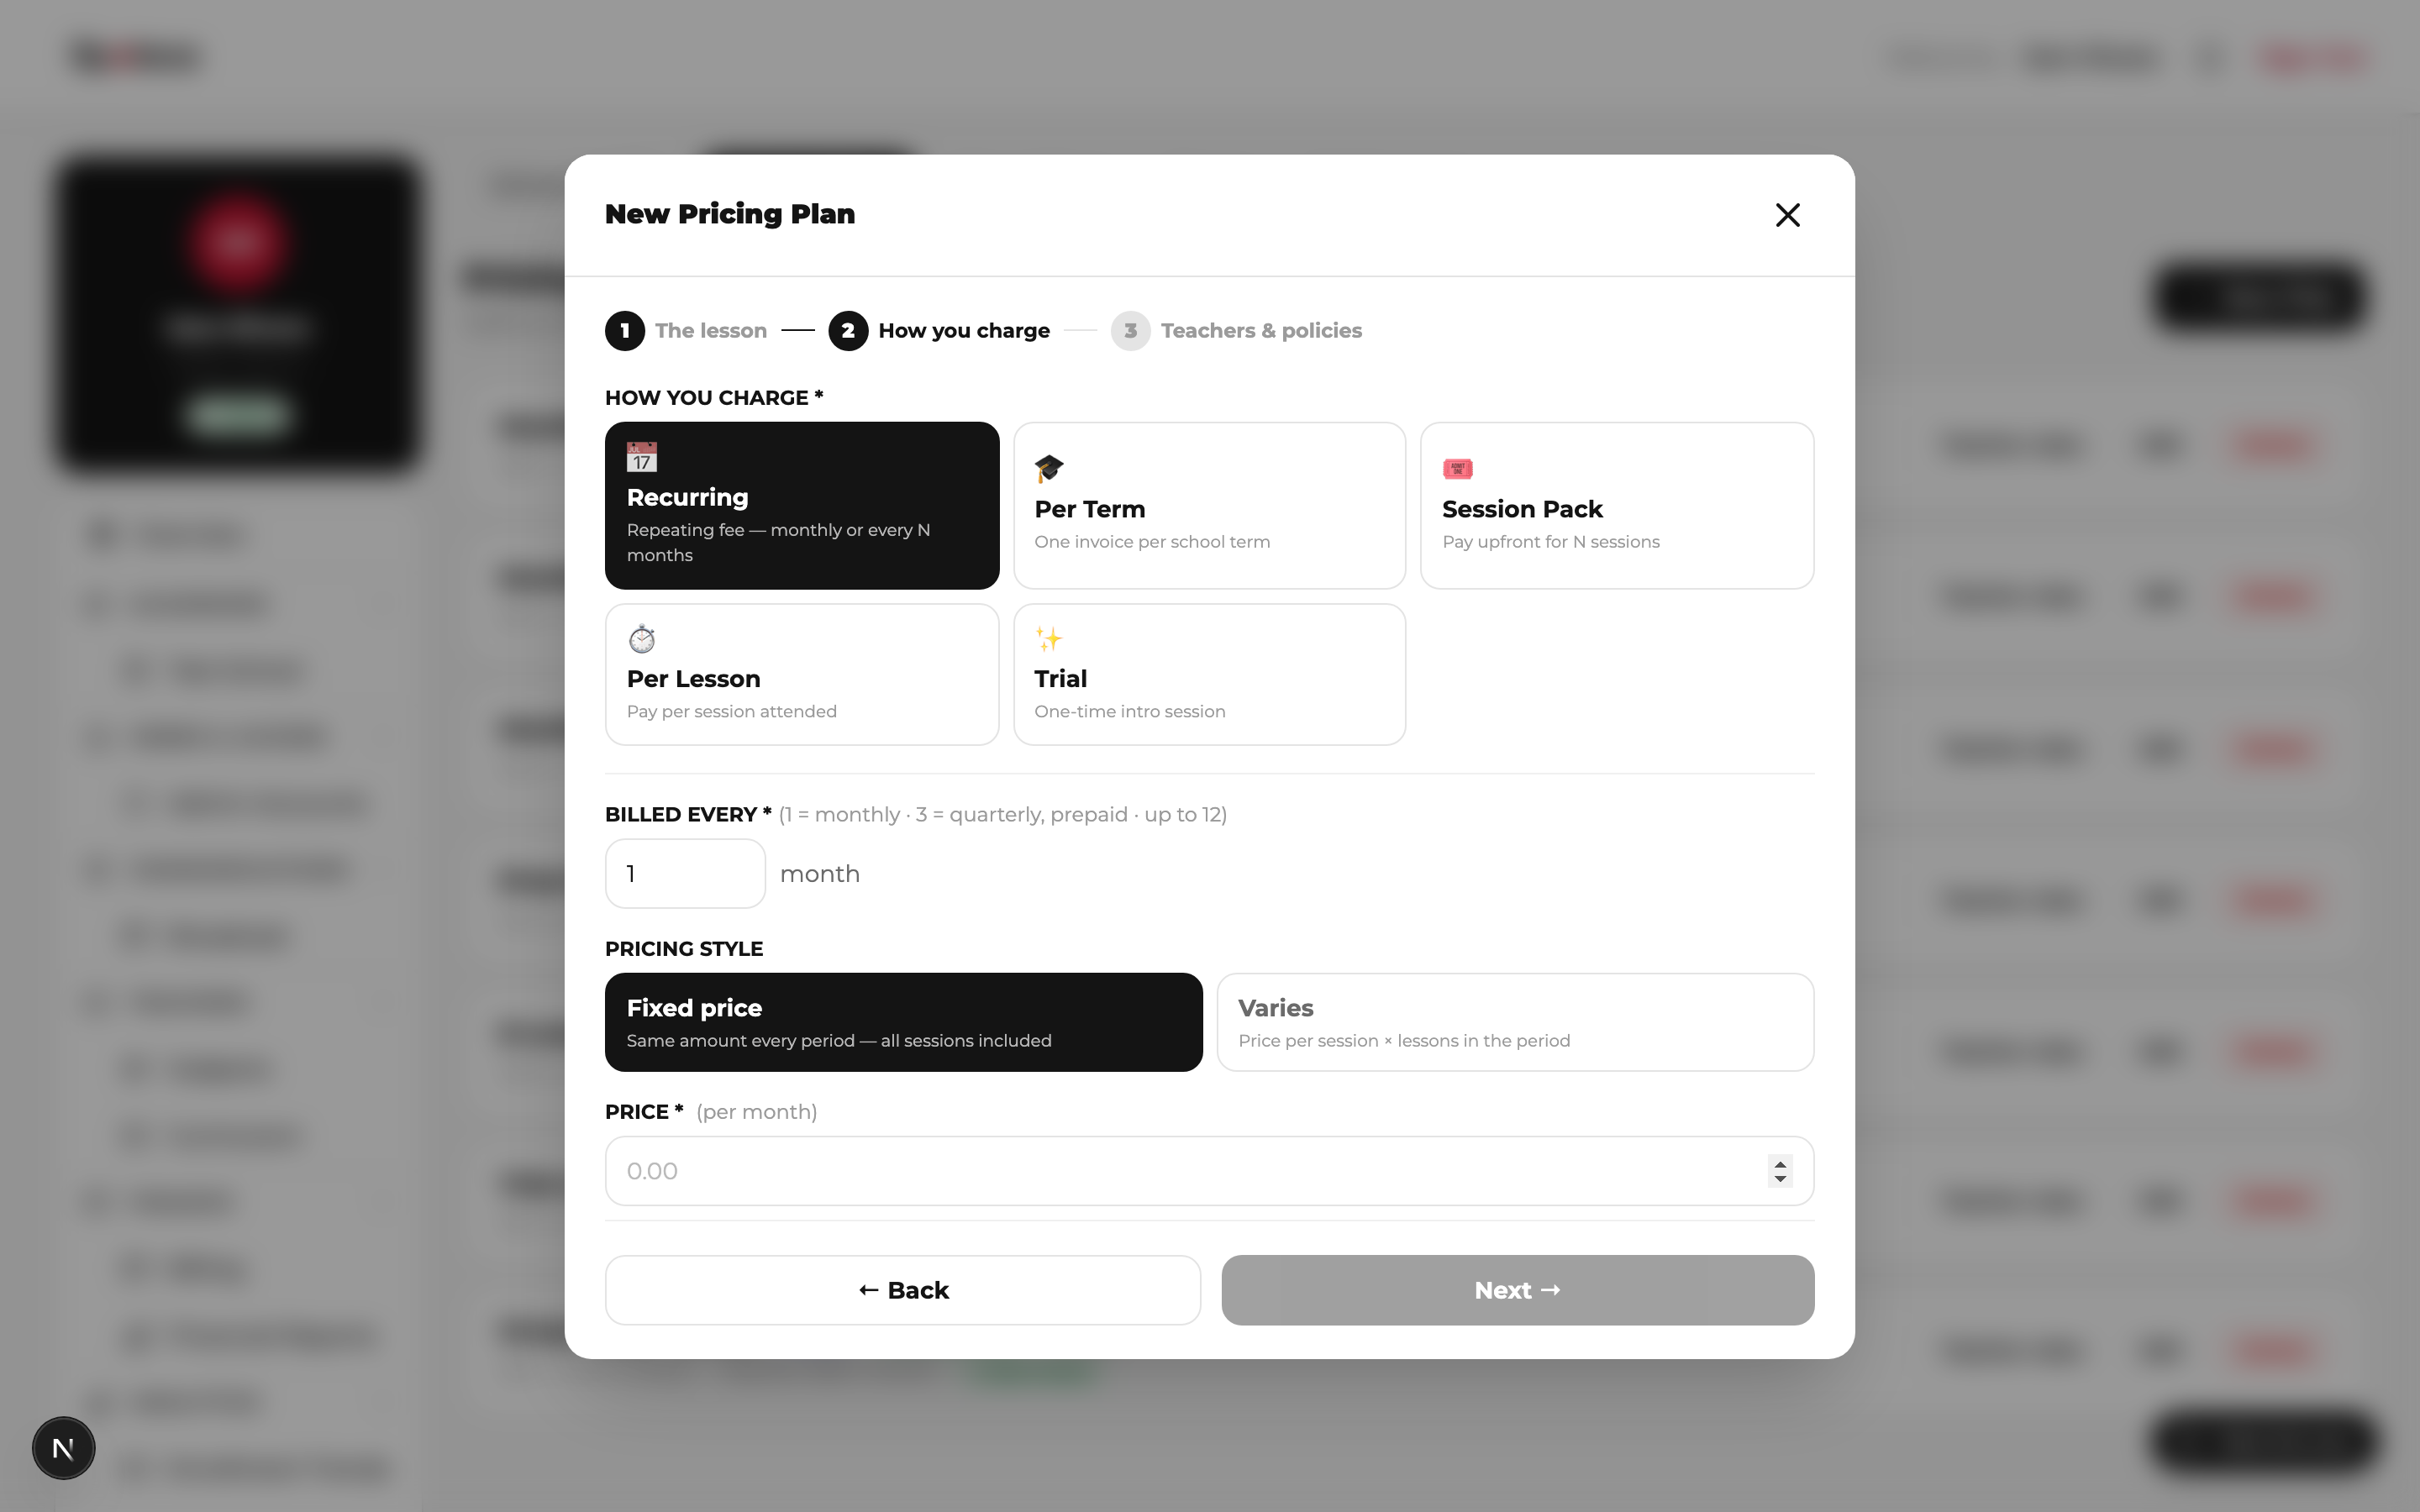
A pricing plan bundles everything about how a lesson type is sold: lesson duration, billing style, student price, and what the teacher earns. Clicking New Plan opens a short 3-step wizard where you build your own plan from scratch — you choose the billing model and every detail yourself:
The lesson
Name it (e.g. "Monthly 60min", "8-Session Pack" — students and staff see this name everywhere), pick Individual or Group Class, choose a duration — 15, 30, 45, 60, 90 or 120 minutes — and for individual plans set lessons per week (1–5). Choose 2+ for intensive students: same teacher, and the extra weekly slots are picked at enrollment.
How you charge
Pick one of five billing models:
| Billing model | How the student pays | Best for |
|---|---|---|
| 📅 Recurring | Repeating fee on a billing frequency you pick from a list — Monthly, Quarterly (prepaid), Every 6 months, Yearly, and so on. Choose Fixed price (same amount every period) or Varies (session price × lesson days in the month — months with 5 Mondays cost more than months with 4). | The classic subscription — and prepaid multi-month plans. |
| 🎓 Per Term | One invoice per academic term, using the term dates you define in School Settings → Terms tab. Optionally cap sessions ("up to 15 lessons per term" — unused ones expire). | Conservatories and academies that charge semester tuition. |
| 🎟️ Session Pack | One flat charge for the whole pack of N sessions, paid upfront — never prorated by the calendar month. Auto-renews with a new pack only when the sessions are used up (not monthly). | 4/8/10-lesson cards, class passes, tutoring hour packs. |
| ⏱️ Per Lesson | Price per individual session — one invoice for the next lesson at a time, which renews as each is paid. | Drop-in or pay-as-you-go students. |
| ✨ Trial | One-time introductory session; never renews; admin is notified when it's done. | Converting prospects — pair it with your public enrollment link. |
Teachers & policies
How is the teacher paid? depends on the billing model you chose:
- Recurring & Per Term plans — pick the rate basis: per month (rate × months in the billing period), per billing period / per term (one total for the whole cycle), per scheduled lesson, or per attended lesson (only sessions marked Present count).
- Session Pack & Per Lesson plans — set the rate, then use the “Pay teacher per attended session” toggle. ON = the teacher earns the rate each time a session is marked Present on the calendar (added automatically, nothing upfront). OFF = paid per scheduled lesson (Per Lesson) or one flat total for the whole pack (Session Pack).
The rate drives automatic teacher-pay calculation, and for recurring plans the wizard previews the total per period. You can later add per-teacher overrides from the plans list (e.g. your senior piano teacher earns more on the same plan). Also set reschedules allowed per month — how many times a student may move a lesson.
How the form is laid out — student on one side, teacher on the other
The plan form is split by who each field affects. It used to interleave the two, and owners were typing a teacher's rate into what they thought was the price.
- "What the student pays" — price, billing frequency, sessions, lesson type, duration, lessons per week, and allowed reschedules per month. Reschedules sit at the end of this half, before you reach anything about the teacher, because they are a student entitlement.
- "What the teacher earns" — the teacher rate and the rate basis, and nothing else.
A running total bar shows what the student is charged and what the teacher is paid for the same period, side by side, updating as you type. An obviously wrong rate — a teacher earning more than the school collects — is visible before you save rather than on the first invoice.
Programs — coming soon
When you create a plan you'll see a third type beside Individual and Group Class: Program, marked Coming soon. A program will let you sell several lessons — say piano plus choir — for one price. It isn't available yet; for now, sell each lesson on its own plan. This guide will explain it in full the day it arrives.
Auto-renew — does this plan continue by itself?
Every plan carries an auto-renew toggle. On a Per Term plan it decides what happens when the term ends:
- ON — when the term rolls over, the student is carried into the next term automatically and the next term's invoice is raised. A student on Fall continues into Winter without anyone re-enrolling them. This runs every term, not only the first.
- OFF — the enrollment ends with the term. Nothing is billed for the next one, and you re-enrol whoever comes back.
It is set per plan, so a school can run "Fall only" workshops and year-long programmes side by side. The same toggle governs group classes on a term plan.
Advanced billing (optional)
Open ⚙️ Advanced Billing to fine-tune: invoice lead days (how many days before the period the invoice is generated — default 7), payment due date, mid-period joiners (prorated by remaining lessons, full price, or free until the next period) and installments (split a term or period fee into 2, 3, 4 or 6 equal payments — the school still issues one invoice for the full fee, with the parts scheduled underneath it). The defaults suit most schools — you never have to touch this.
5 · School settings & branding
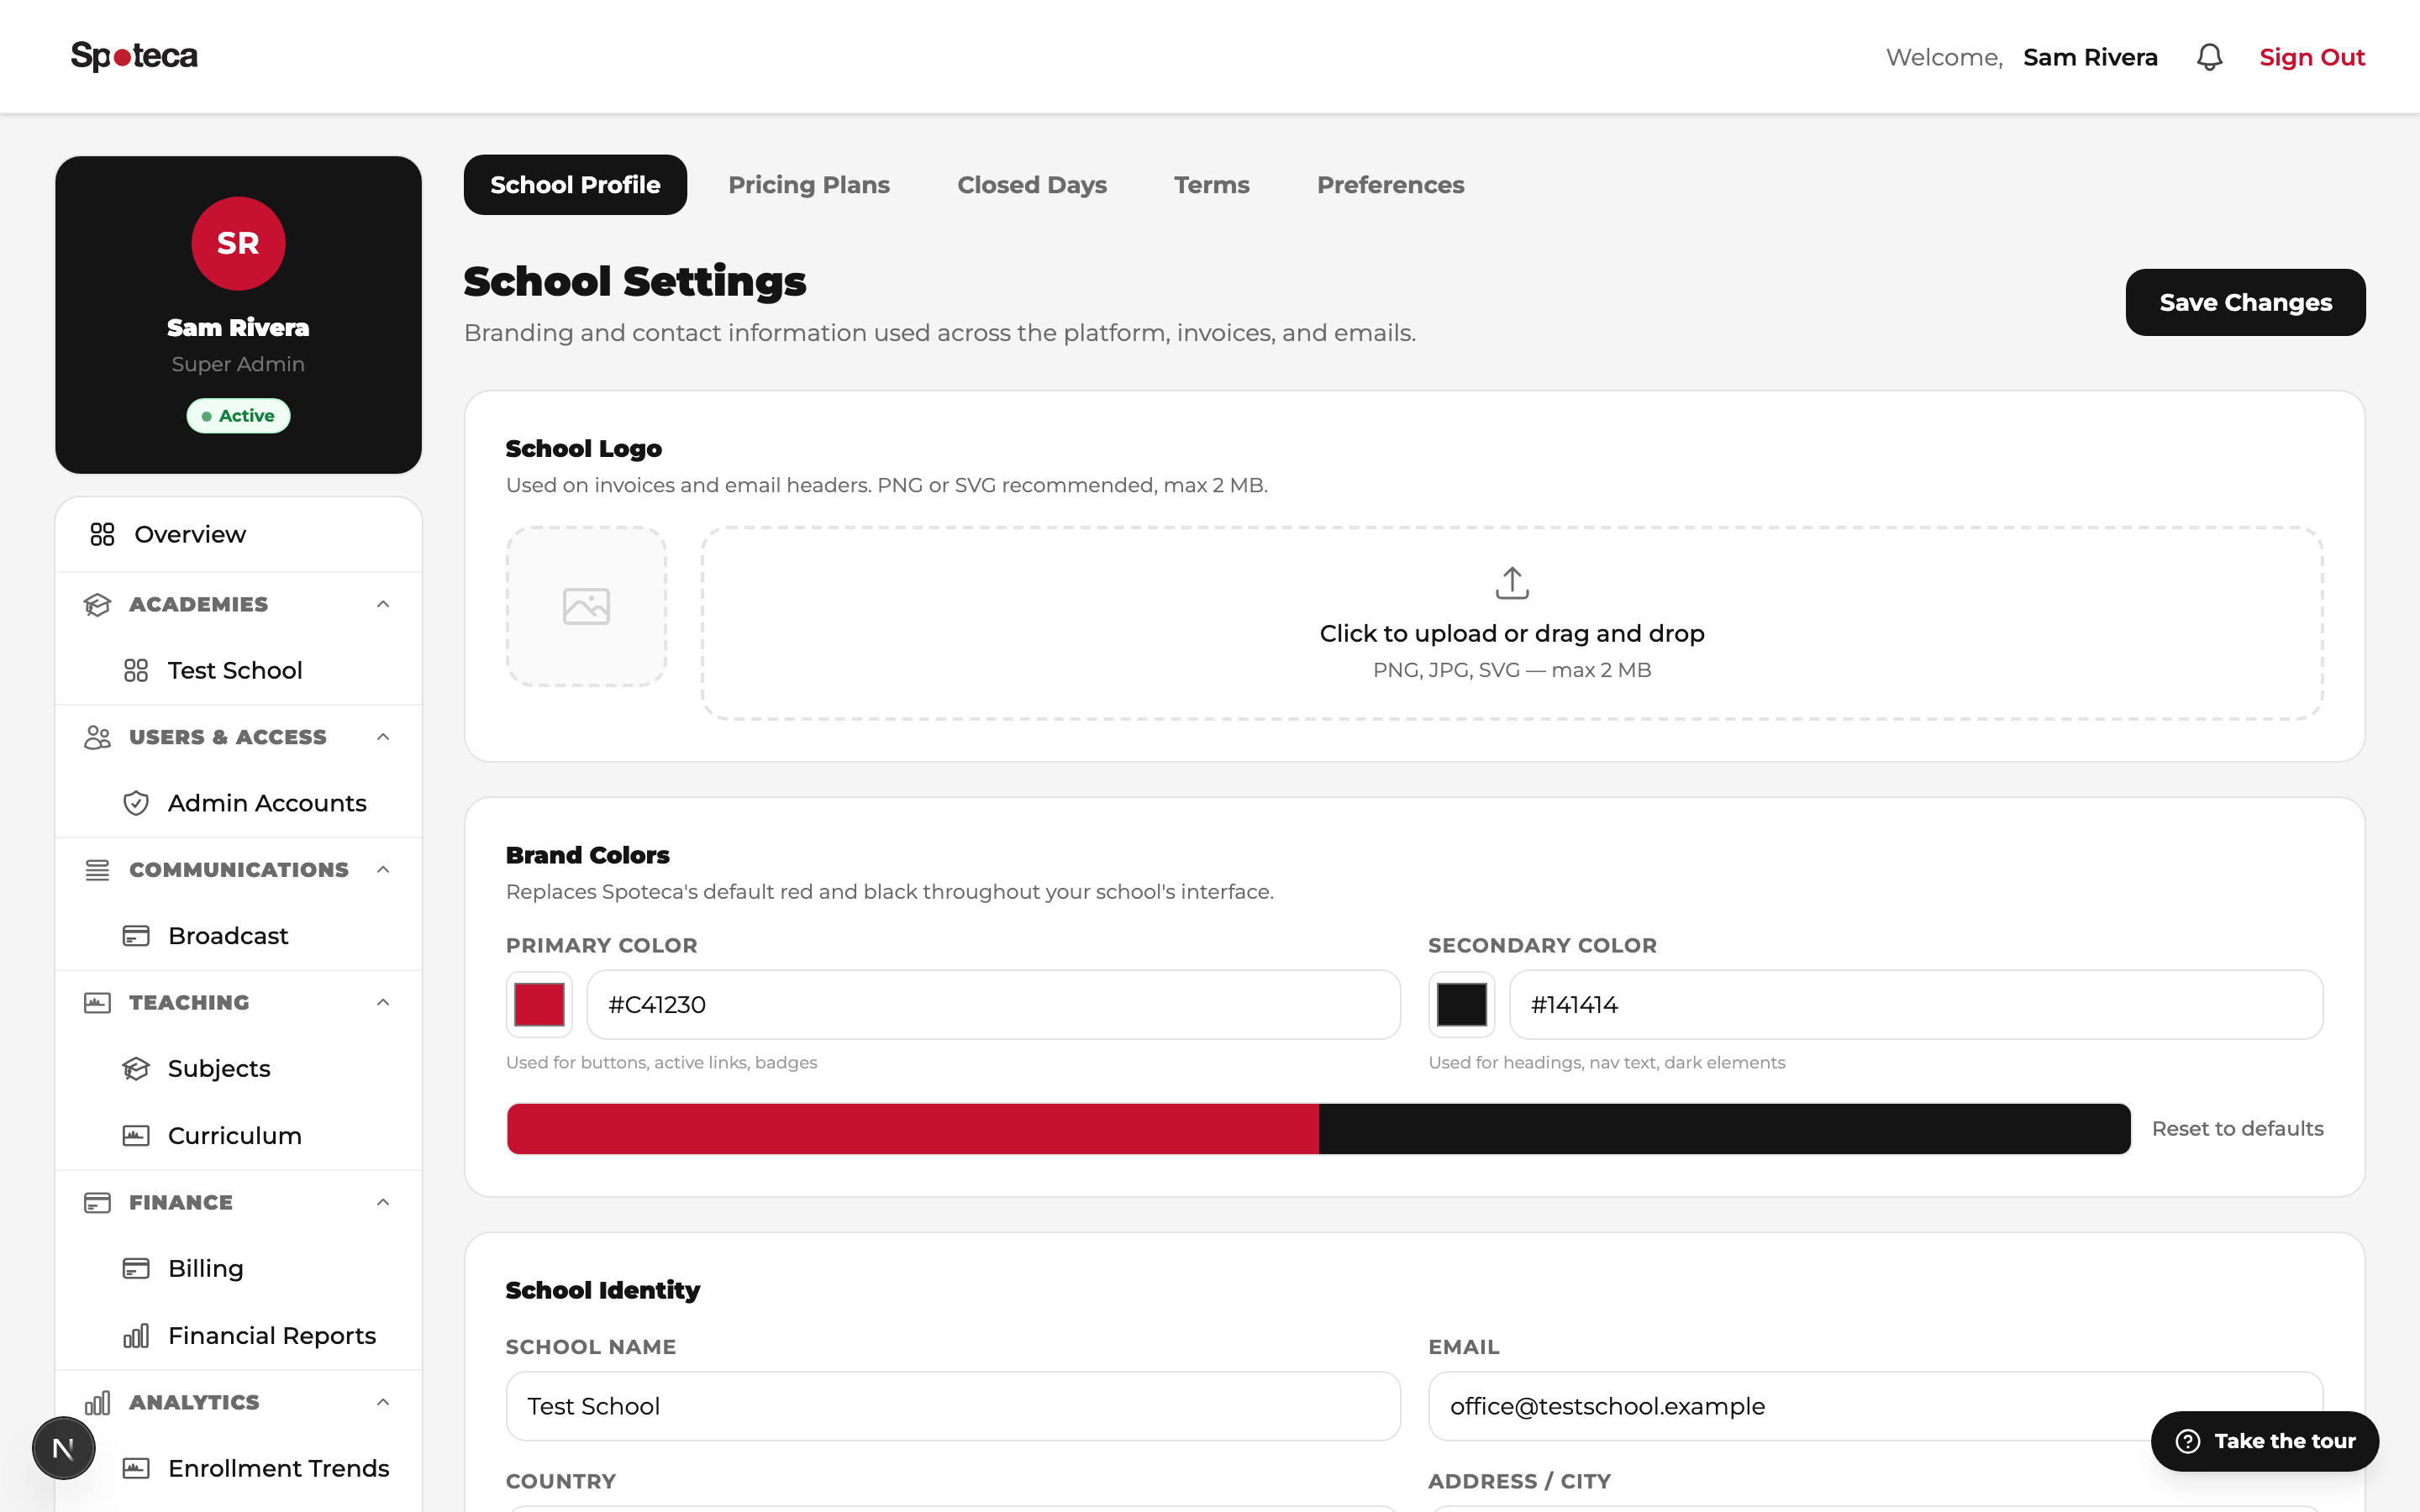
Sidebar → School Settings → School Profile tab
The School Settings page is a set of tabs. The first, School Profile, is where you set your logo (appears on the login portal, dashboards, invoices and receipts — any size; it is resized automatically), brand colors, currency (shown on invoices and receipts — USD, EUR, JOD and more), time zone (see below), school name/identity and email footer. The other tabs each own one area:
- Subjects — the list of subjects your school teaches (starts empty — add your own).
- Rooms — your practice rooms and which subjects each is set up for (the same Rooms module as the Admin view).
- Pricing Plans — the pricing plans from the previous step.
- Closed Days — single dates the school is shut (holidays): no lessons are scheduled on them.
- Curriculum — levels, skills and badges (covered in section 9).
- Terms — define your academic terms (e.g. Fall 2026: Sept 7 – Dec 18). Required for Per Term pricing plans: each enrolled student is invoiced once per term, automatically, before the term starts.
- School Hours — the hours your school is open, painted on the same weekly grid teachers use. See the note below: these schedule nothing by themselves.
- Preferences — school-wide toggles: student reschedule requests, whether teachers see payments, self-enrollment, whether Admins may manage the Subjects list, whether Admins may set teacher availability, whether teachers see a student's other subjects.
- Admin Accounts — your staff logins (covered in section 6).
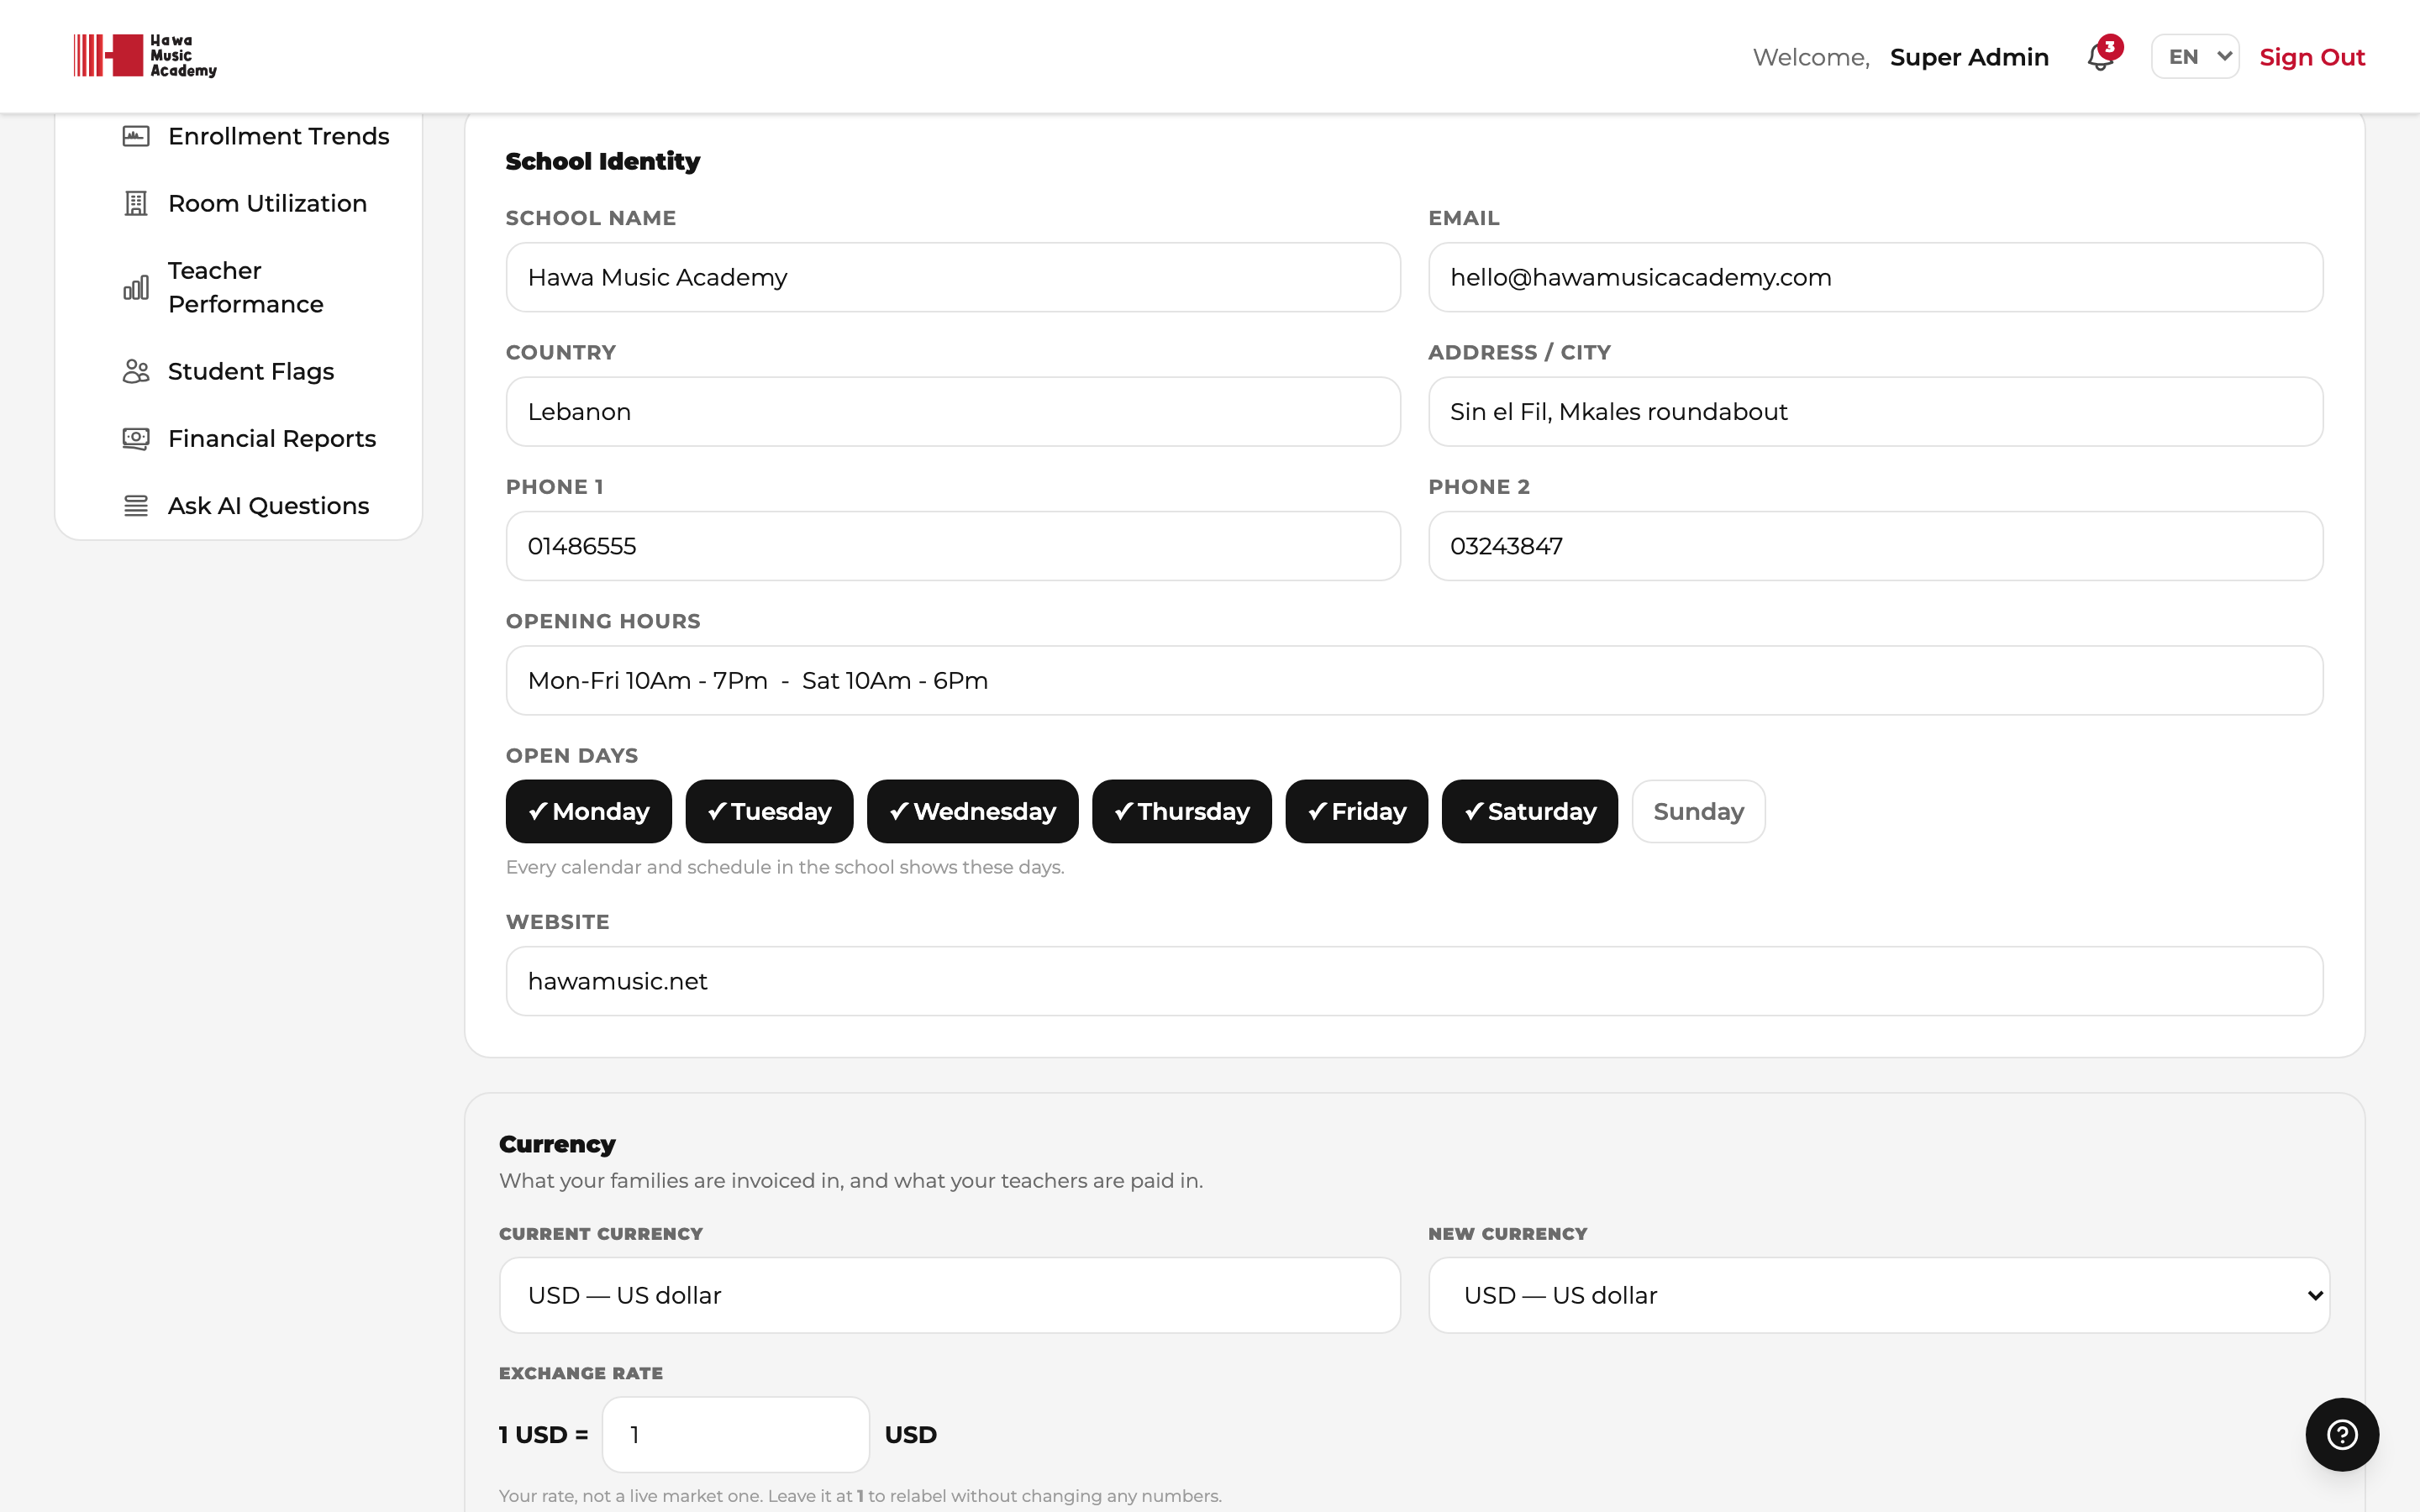
Open days
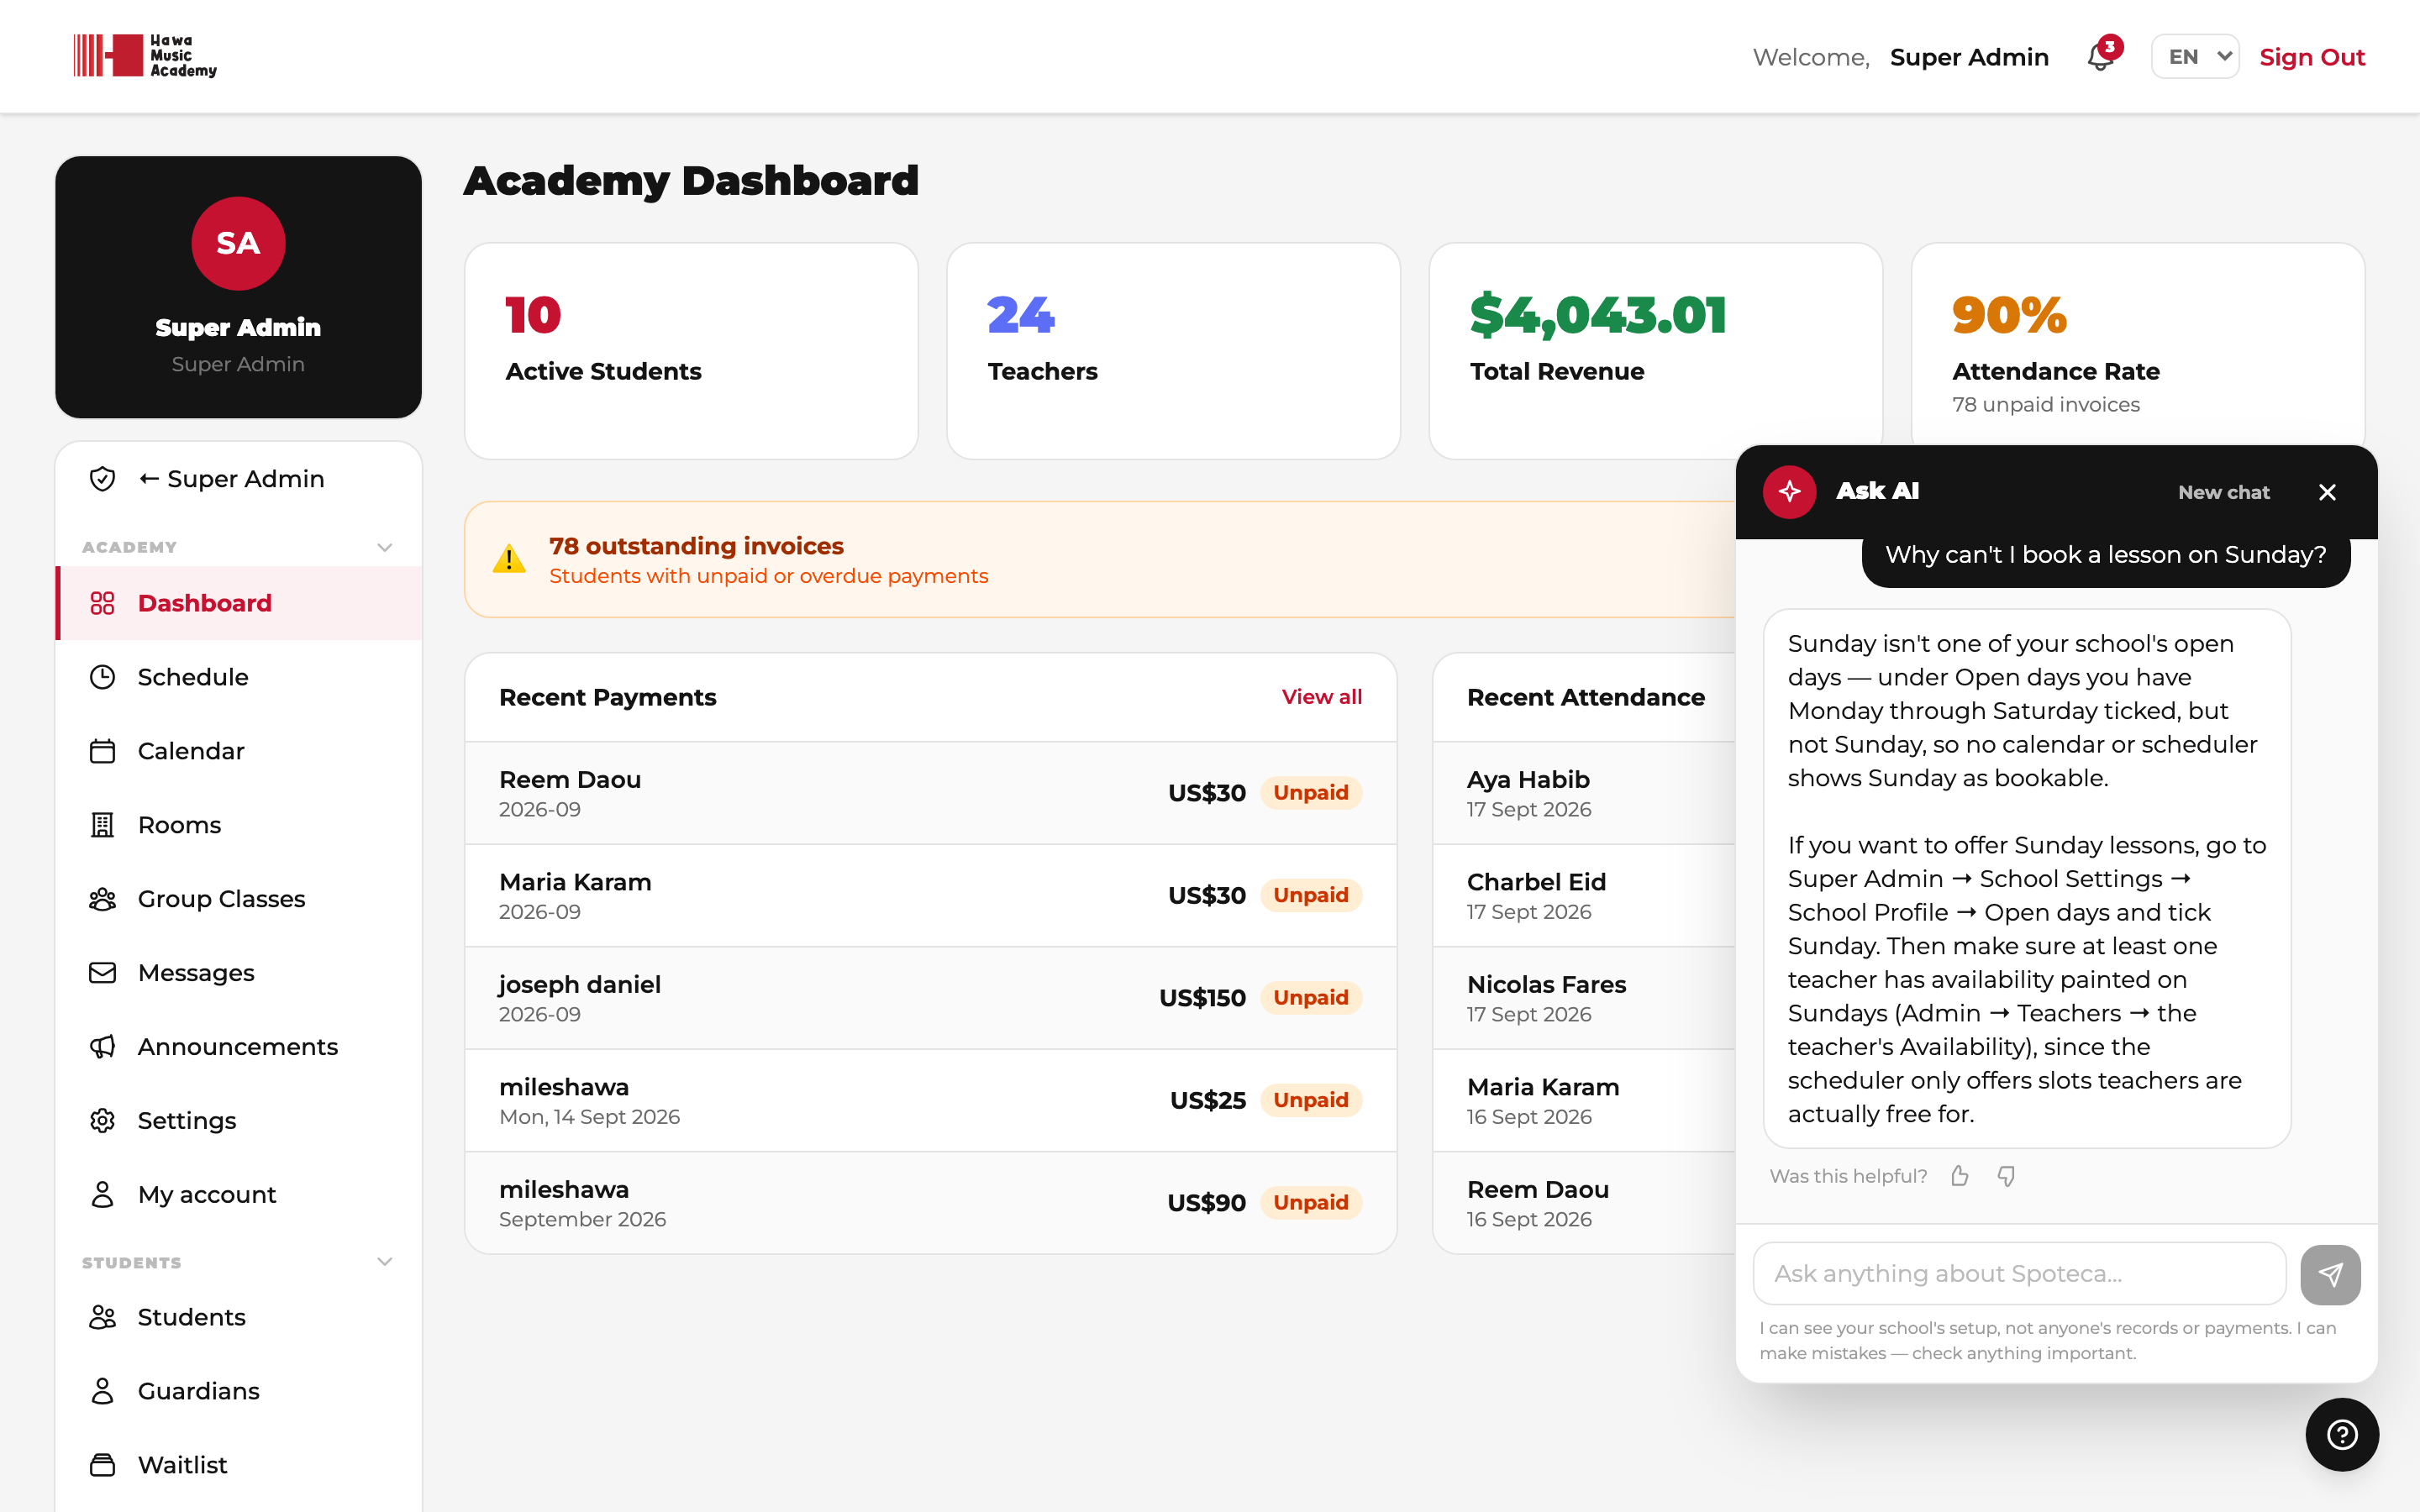
School Settings → School Profile → Open days — tick the weekdays your school works. Every calendar and schedule in the school then shows only those days, for everyone.
- A day with classes on it can't be closed. Untick it while lessons are still booked and nothing is saved: Spoteca lists the weekly lessons and group classes on that day, with a link to each, so you can move them first.
- If a closed day ever does have something on it, it stays visible with a Closed tag, so no lesson silently disappears.
- Open days are not Closed Days (single holiday dates, on their own tab) and not School Hours (the opening-hours template teachers can import).
Your school's time zone
School Settings → School Profile → Time zone — or on the first screen of the setup wizard, beside Language and Currency.
Pick where the school is, not where you happen to be sitting. An owner checking in from abroad should still see their school's own clock.
What it changes: every time Spoteca shows you. The calendar, the schedule, attendance, audit-log timestamps, "created" and "paid" times on invoices and receipts, notification times — all of it is displayed in your school's zone, whatever device the reader is on.
What it does not change: days and dates. A lesson booked for Tuesday is Tuesday everywhere. Only clock times and timestamps follow the zone.
6 · Admin accounts
Sidebar → School Settings → Admin Accounts tab
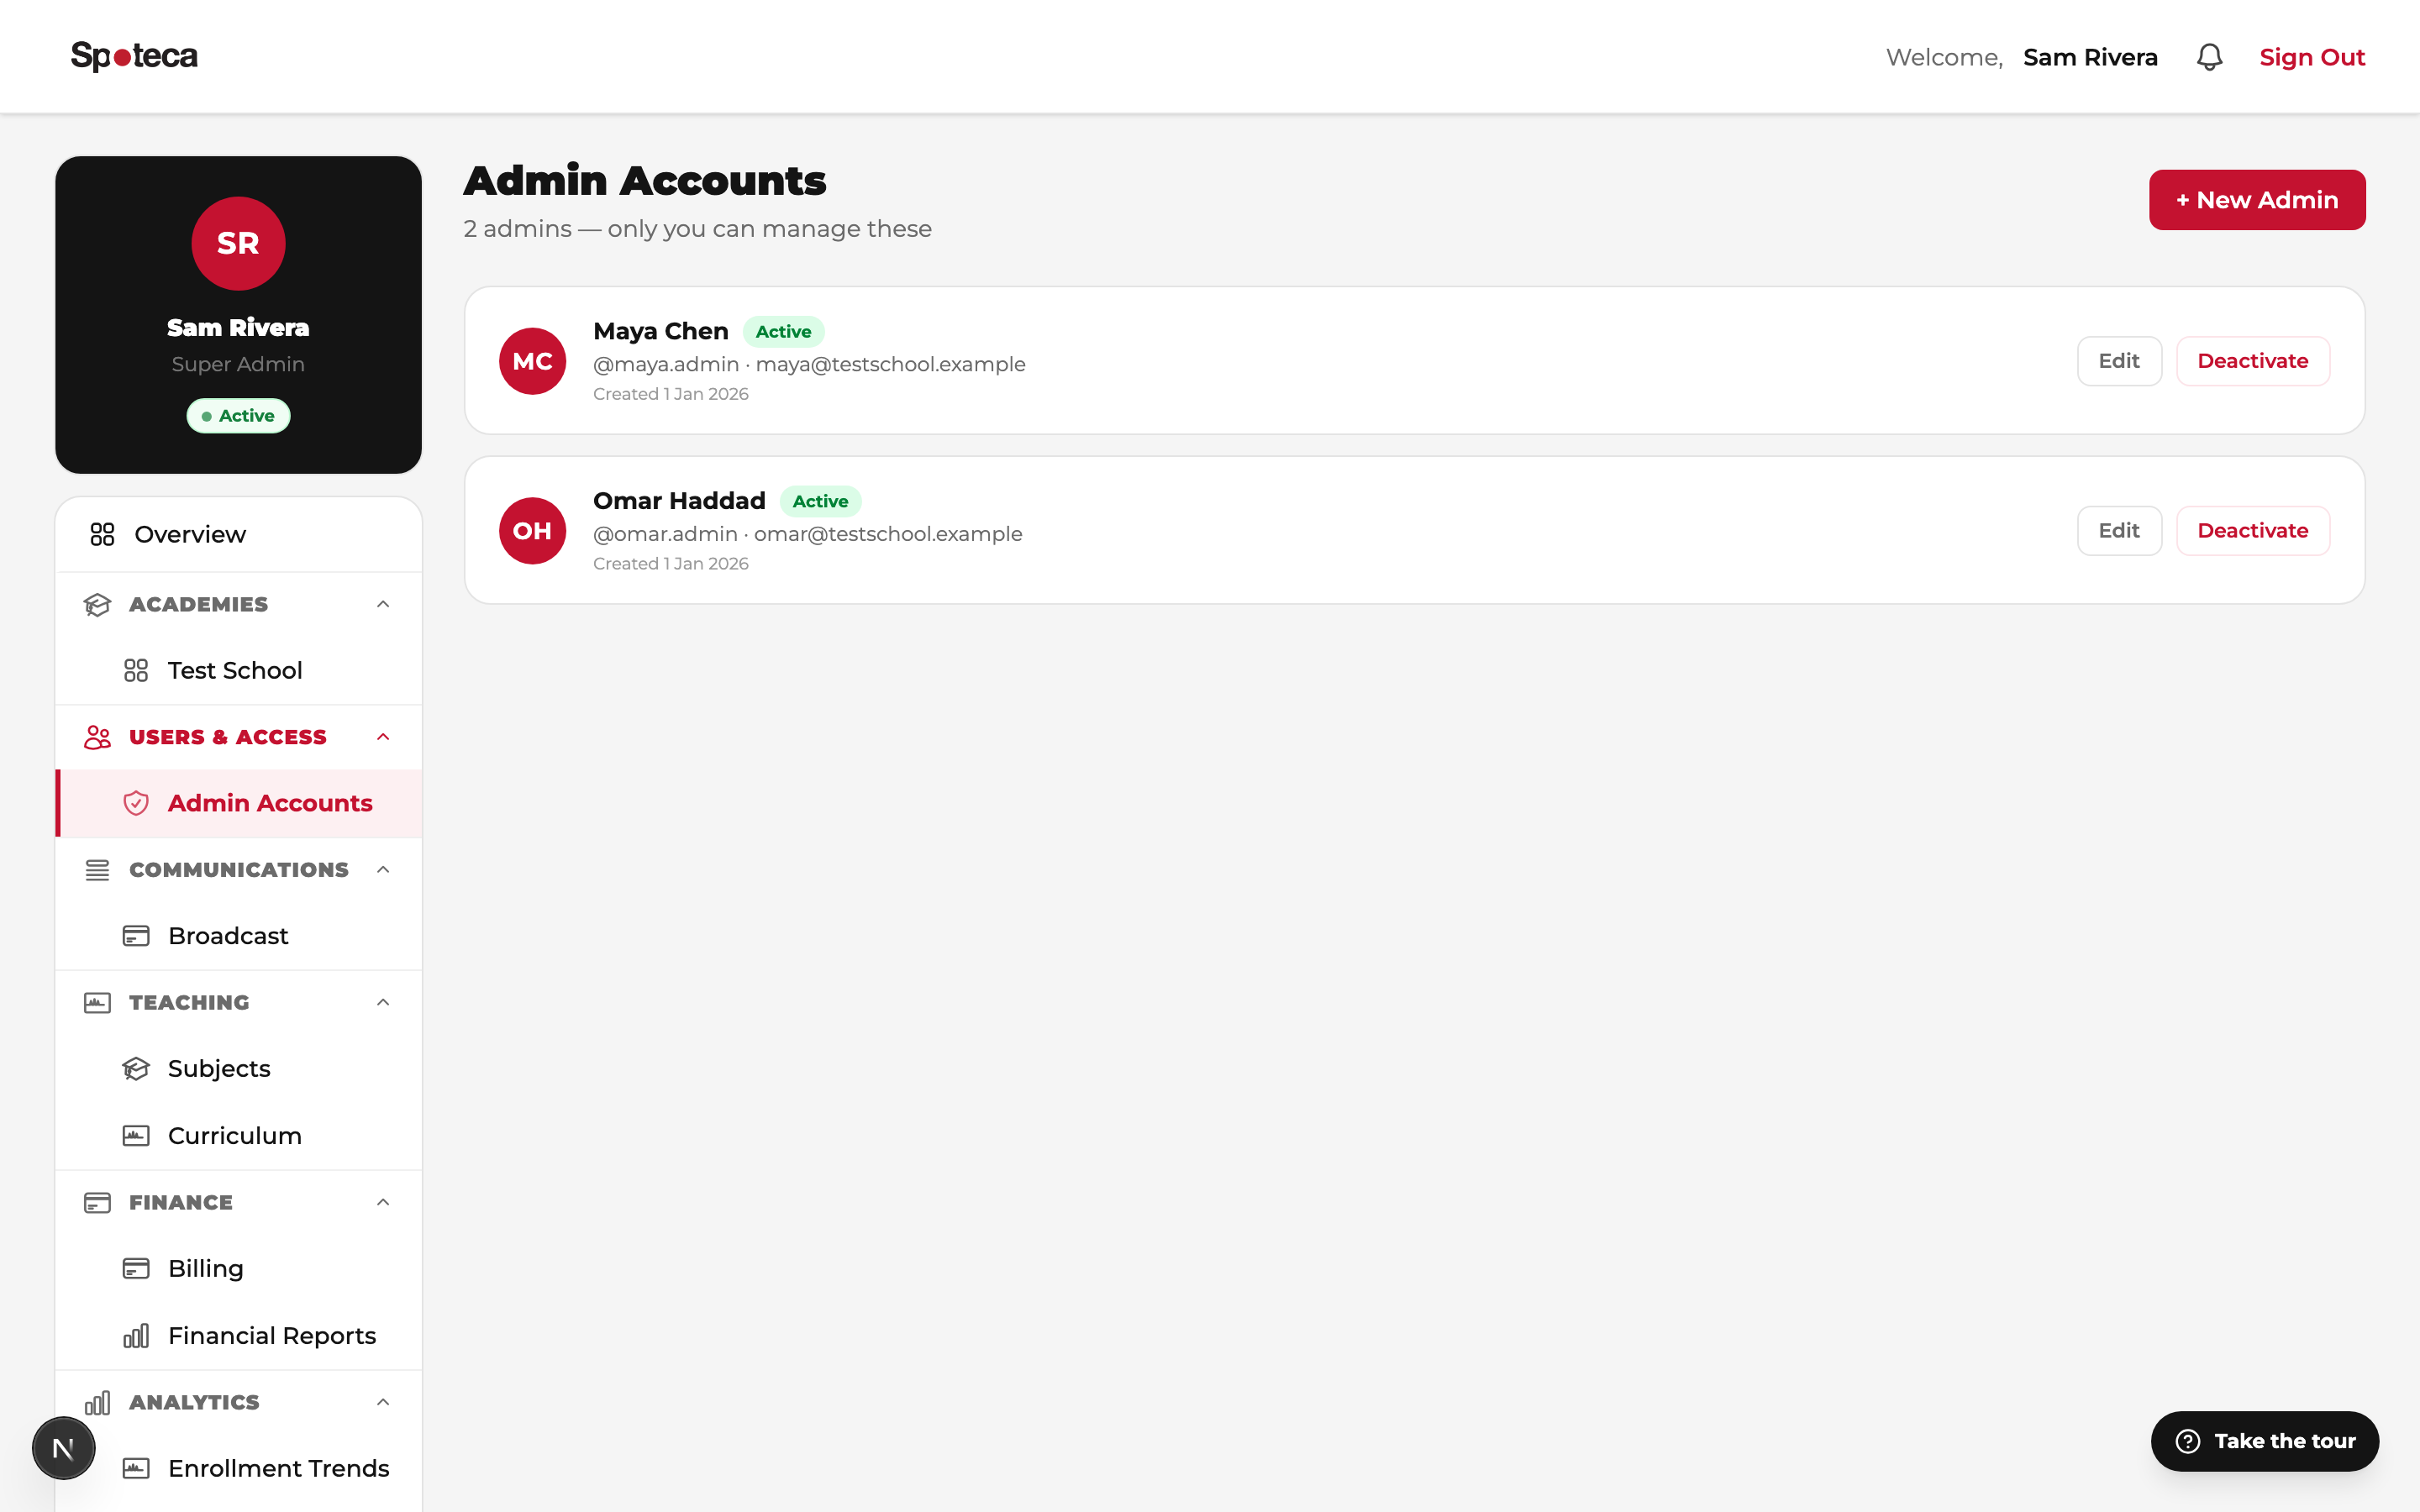
Create an Admin login for each staff member who runs daily operations. Admins can manage teachers, students, scheduling, payments and communication — but cannot touch curriculum, pricing plans, school settings or billing. If you're an owner-operator, you don't need a separate Admin account: you already have the full Admin view.
7 · Switch to the Admin view
Click the colored Go to Admin View button at the very top of your sidebar to jump into the Admin dashboard — no logout needed. This is where teachers and students are added, so your next steps continue in the Admin guide: add teachers → have them set availability → enroll students.
8 · Teaching here yourself
Most schools that start on Spoteca are one person. If you own the school and give the lessons, you do not need a second account.
"I teach here too"
In the setup wizard, above the Add Teacher form on step 3, sits Do you teach here yourself? Pick the subjects you teach and press I teach here too.
This attaches a teacher profile to the account you are already signed into. It asks only for subjects, because your name, phone and photo are already on your account. Your availability, your students and your pay all live on the login you already use.
On step 4 you are at the top of the list, marked (you) and Start here — press Paint availability to mark the hours you teach. The same goes for a teacher you have just added: whoever has no hours yet comes first, newest first.
Switching to your teacher view
Once you teach here, a blue 🎹 My Teacher View button appears in the top right of your Super Admin dashboard, next to your plan badge. It's blue on purpose — teacher things read blue throughout Spoteca, admin things red, billing amber.
Click it and you're in the teacher portal, seeing exactly what your teachers see: your own weekly grid, your students, your lesson notes and your pay. Your top bar keeps a switcher to come back — you have not logged out and you have not lost your Super Admin powers.
| In your Super Admin view | In your teacher view |
|---|---|
| The whole school — every teacher, all revenue, settings and billing. | Only your own lessons, students, notes and pay. |
| You act as the owner. | You act as one teacher among the others. |
If you stop teaching
You can remove your own teacher profile — but not while it is still in use. If you have lessons, students or scheduled sessions attached, Spoteca refuses and tells you to reassign them to another teacher first. That is deliberate: dropping the profile would orphan a live timetable.
If you stop teaching
Use I stop teaching here on the same screen. That removes the teacher profile from your account and leaves your login exactly as it was.
The same applies to any admin who also teaches: remove them from teaching, or deactivate the person from Admin Accounts — not from the teacher list.
9 · Import your existing data (Excel)
Sidebar → School Settings → Import Data
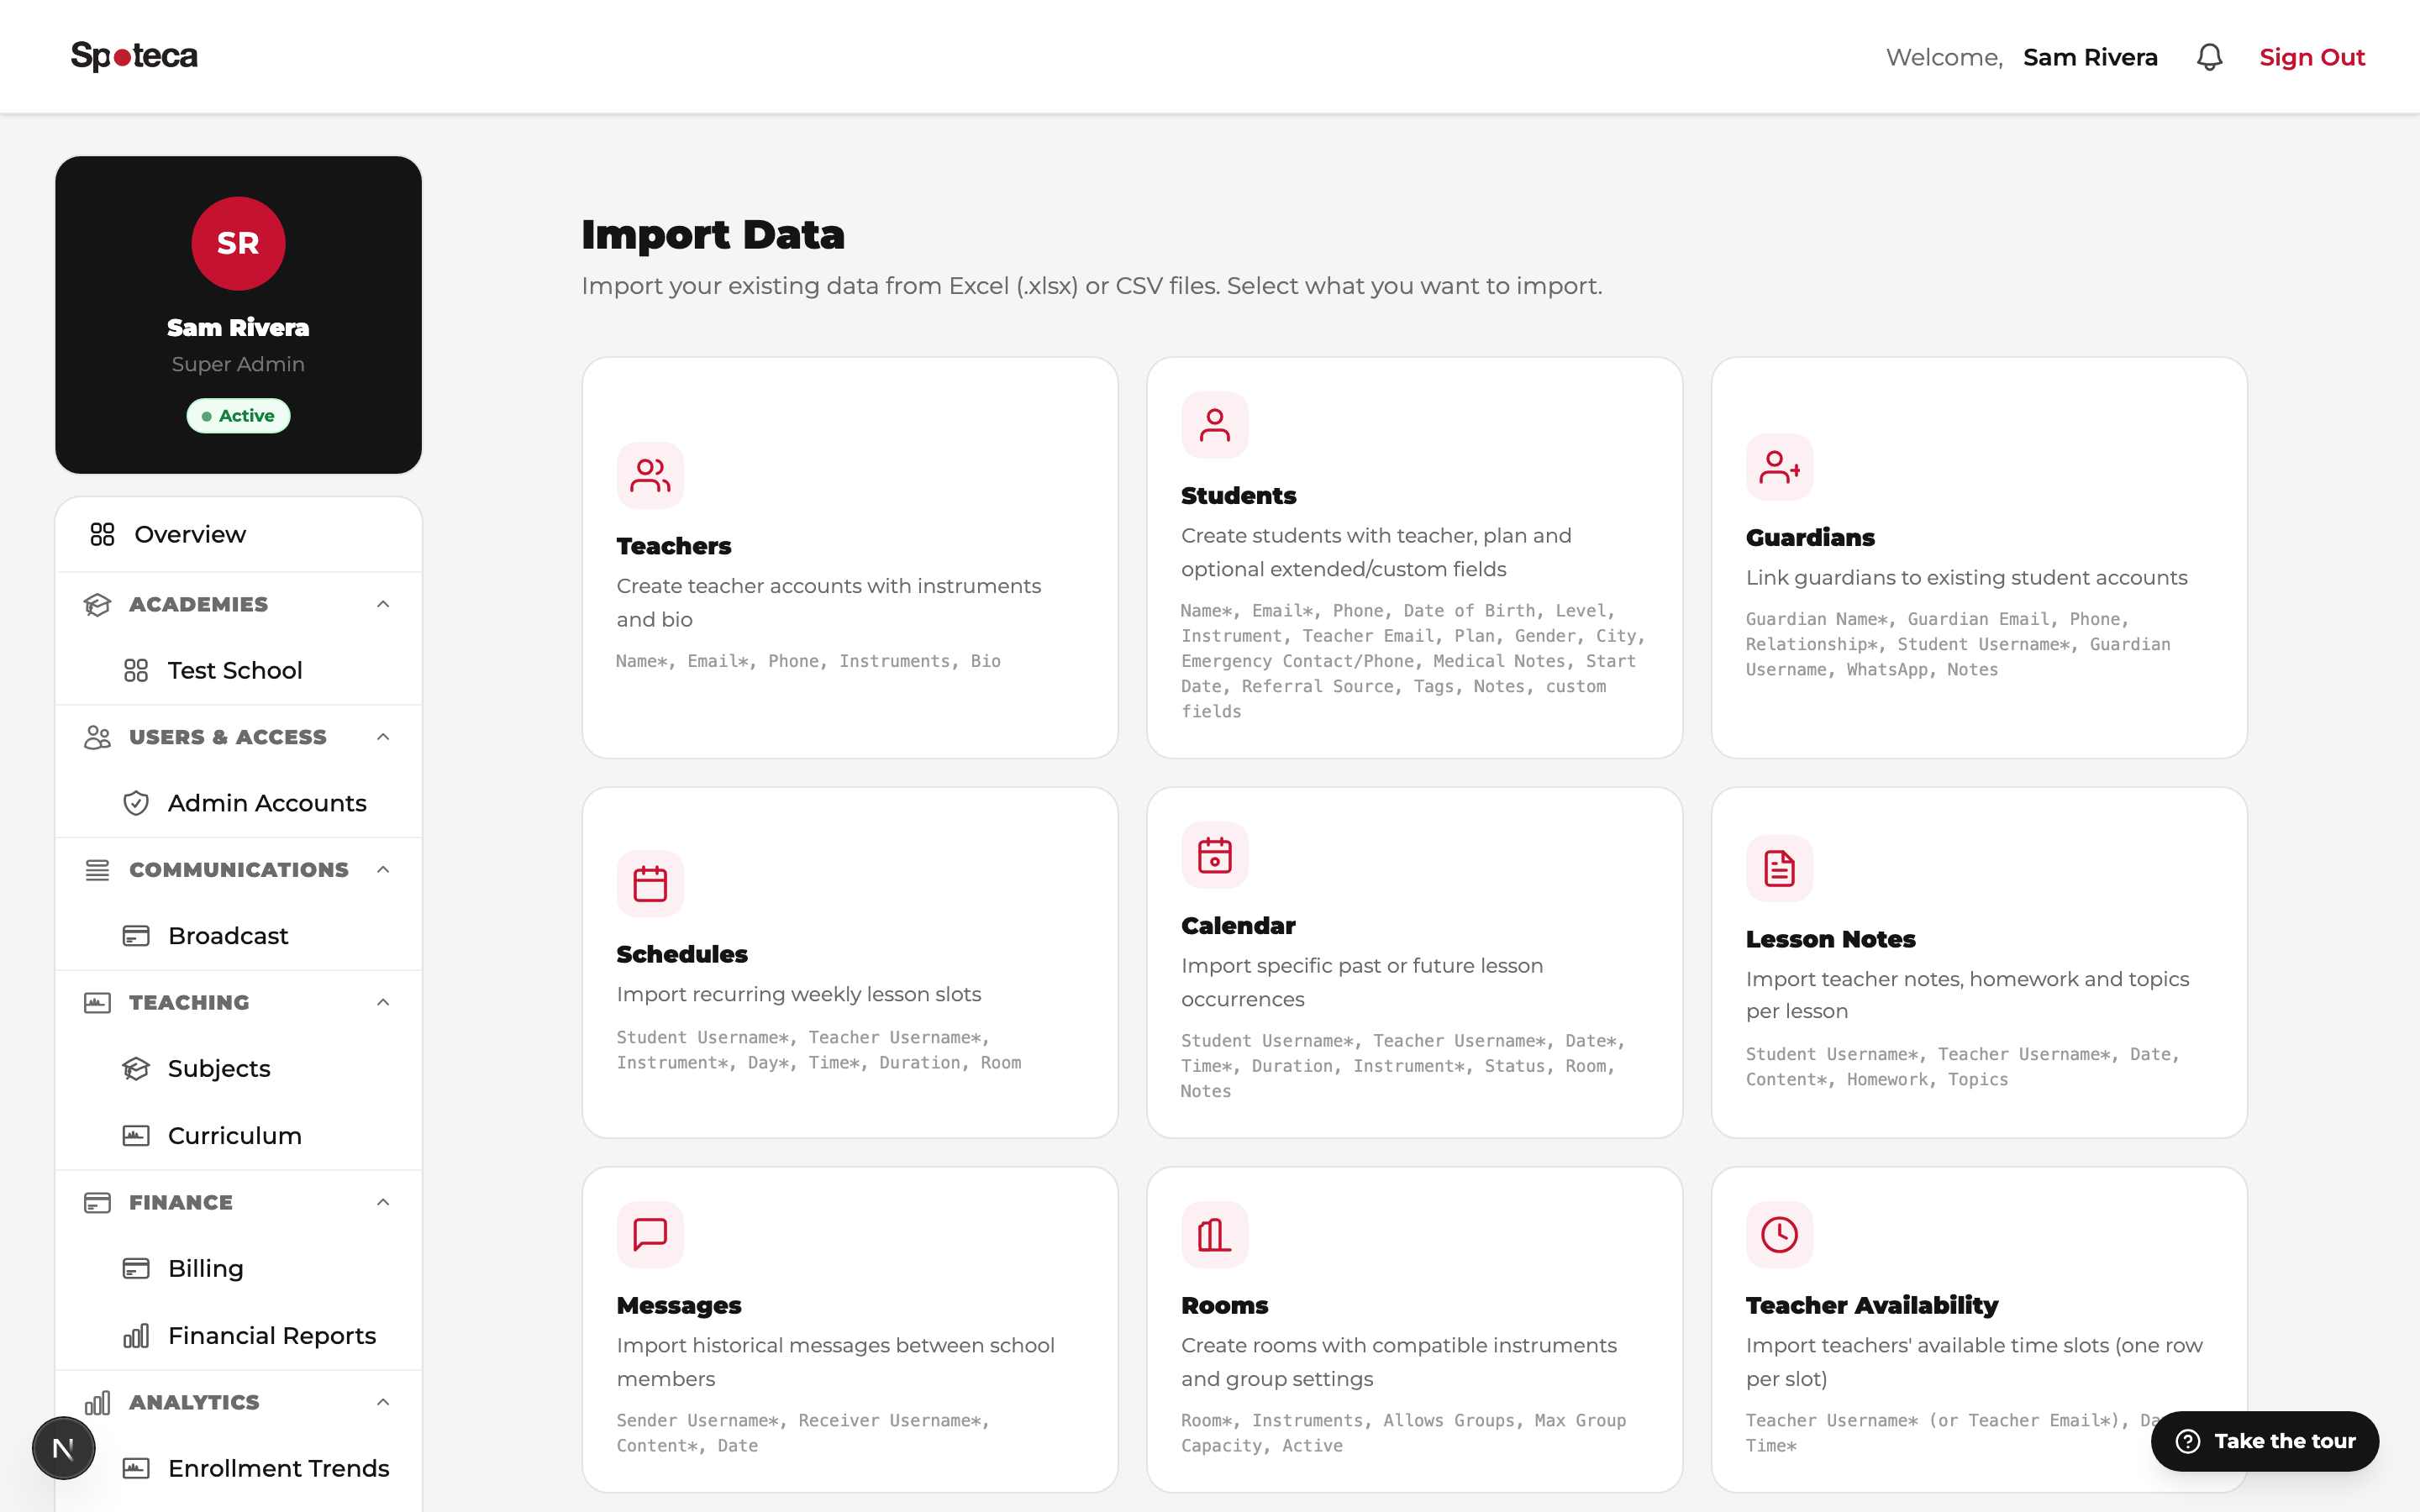
Moving from spreadsheets, My Music Staff, or another system? Import your whole school from Excel files. Each entity has a downloadable template with the exact columns:
- Teachers — name, email, phone, subjects, bio.
- Students & Guardians — profiles, contacts, parent links, plan & teacher.
- Schedules — existing weekly lessons.
- Availability — teacher available slots (see below).
- Group Classes — the class, its weekly slots and its members. Imported as drafts: nobody is invoiced and no register exists until you activate the class yourself. Use Weekly Slots for a class that meets more than once a week — "Monday 17:00, Wednesday 16:00" — which is exactly how the export writes it.
- Rooms, Calendar, Notes, Messages — everything else.
Do the import in this order: teachers first → create your pricing plans → then students. In the student sheet, Teacher Email and Plan are matched to records that already exist; a value that doesn't match is flagged as a warning in the results and the student still imports (just without that teacher or plan).
Migrating students who are partway through a plan
For a brand-new student starting fresh, leave the three columns below blank — they get a normal first invoice, exactly like enrolling them one at a time. For students you're bringing over mid-plan, fill them in so their billing is correct from day one:
| Column | What it does |
|---|---|
| Enrollment Start Date | The date they actually started (sets the billing anchor) — not today's date. |
| Sessions Used | For session-pack (bundle) plans: how many sessions they've already used, so "sessions left" is right immediately. |
| Skip First Invoice | Put Yes for students who already paid you elsewhere — the first invoice is recorded as already paid instead of billing them again. |
Guardians — contacts by default, logins on request
Guardians are imported as contacts linked to a student (match by Student Username, so import students first). By default a guardian gets no login. To give a parent portal access during the import, put Yes in the Create Login column — Spoteca then generates a username and temporary password for them, shown in the results and included in the Download credentials CSV. Leave it blank for a contact-only guardian. When you export guardians, a Has Login column shows who already has an account.
Fixed school hours? Import availability instead of asking teachers
If your school assigns teachers fixed working hours (e.g. everyone teaches 15:00–20:00), you don't need teachers to paint their own availability. Prepare one sheet with a row per teacher per slot:
| Teacher Username | Day | Time |
|---|---|---|
| nadia.k | Monday | 15:00 |
| nadia.k | Monday | 15:15 |
| nadia.k | Monday | 15:30 |
| …one row per 15-minute slot, per day, per teacher. Duplicate rows are skipped automatically, so you can re-import safely. You can also identify teachers by Teacher Email instead of username. | ||
Tip: build the sheet in Excel with autofill in minutes — column of 15-minute times, copy per day, copy per teacher. After import, teachers can still fine-tune their own grid.
10 · Set up the curriculum — when you're ready
Sidebar → School Settings → Curriculum tab
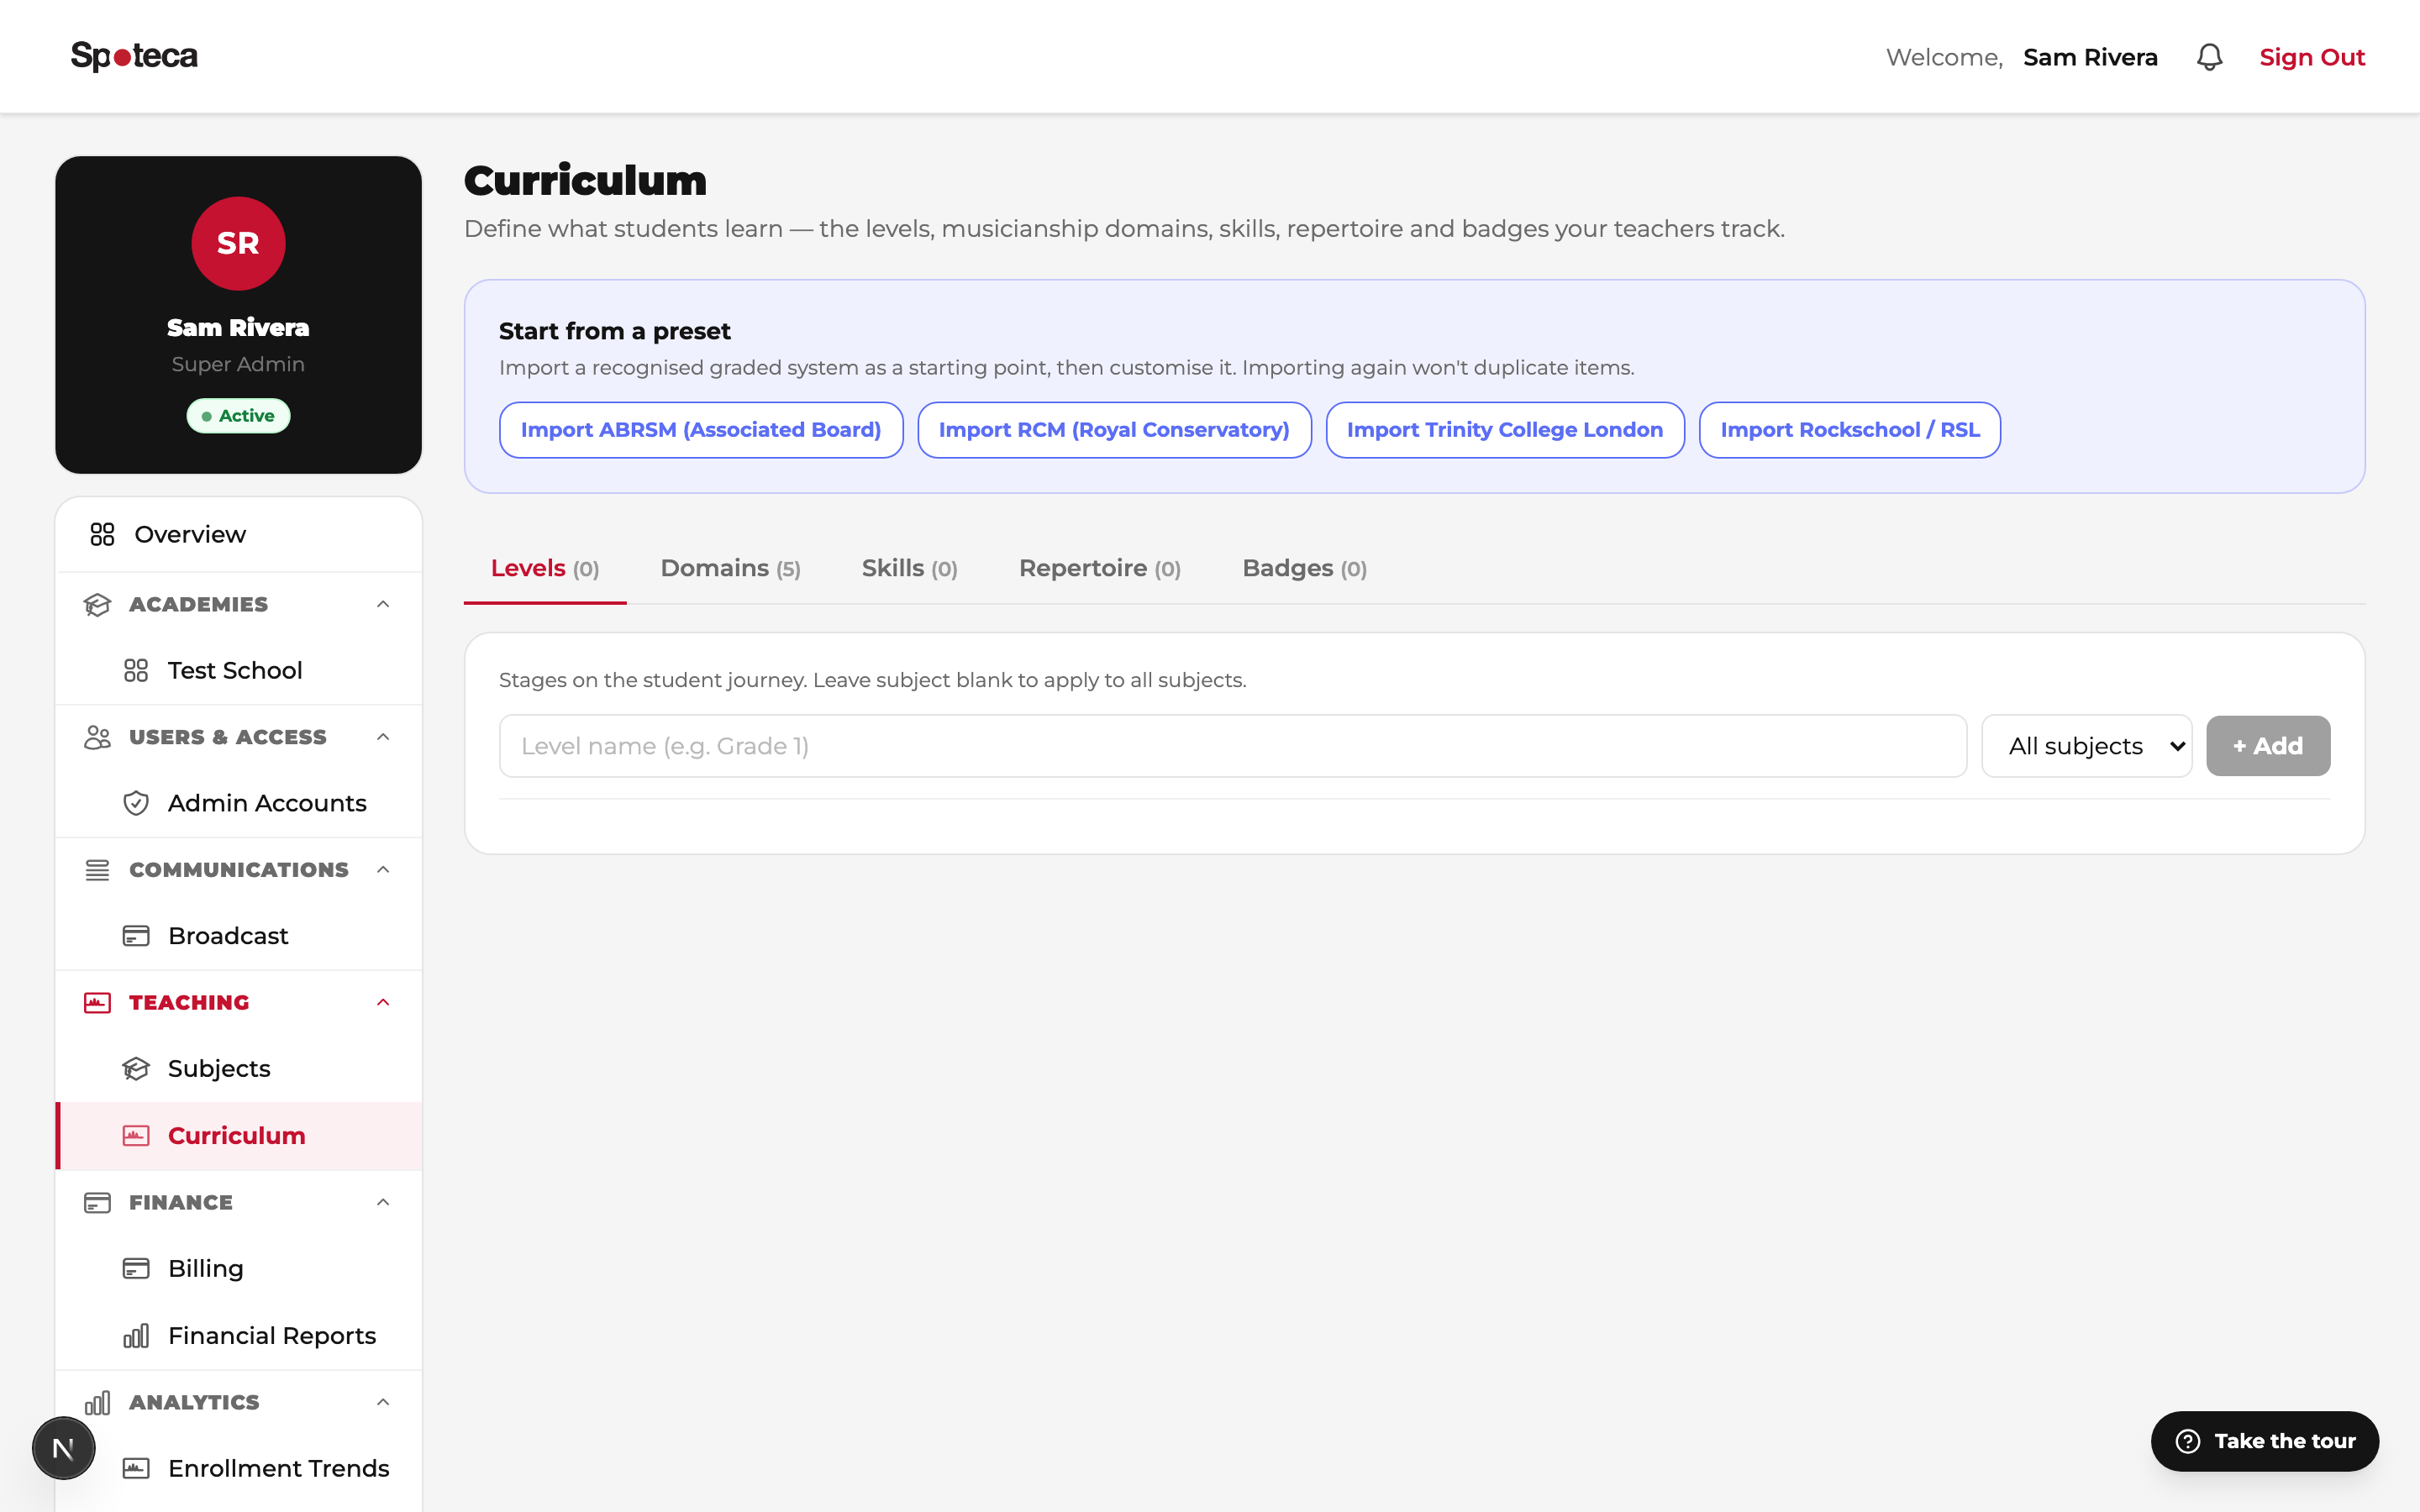
The curriculum defines what students learn at your school. It powers each student's Journey page, the teacher's progress-tracking tools, badges, and printable progress reports. It has five building blocks:
| Block | What it is | Examples |
|---|---|---|
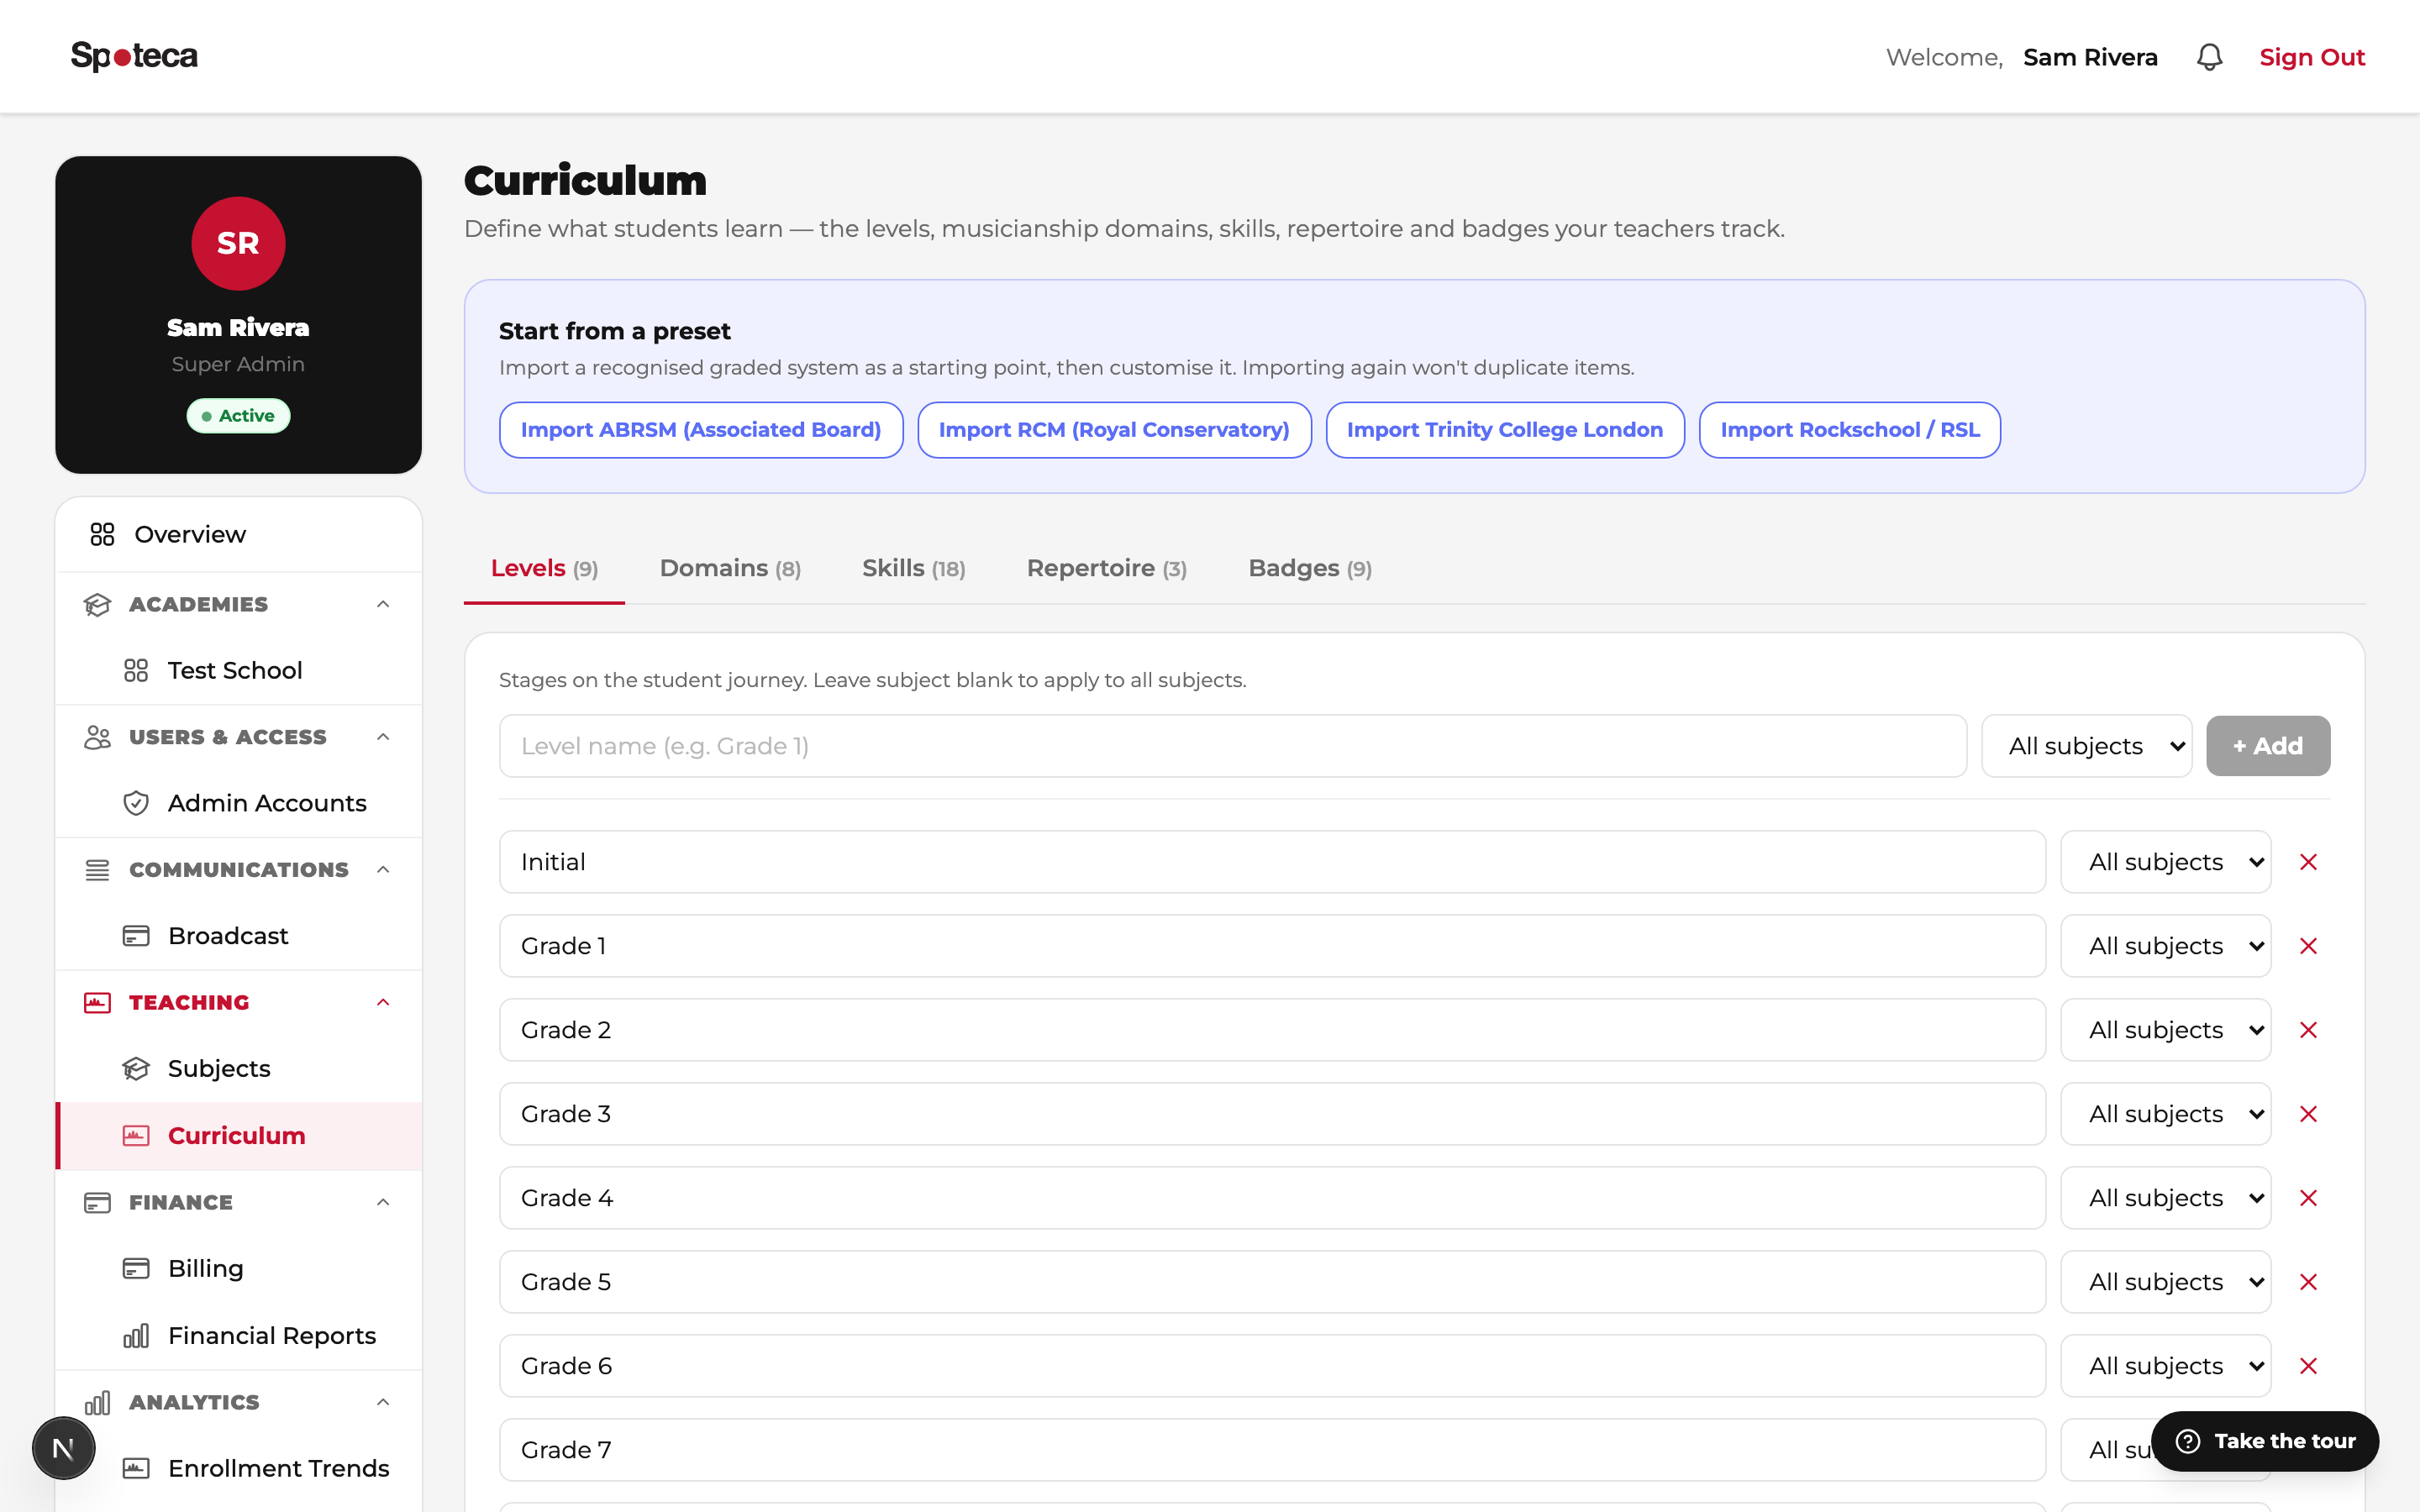
| Levels | Stages on the student journey, optionally per-subject. | Grade 1…8, Beginner/Intermediate/Advanced |
| Domains | Musicianship areas you track. | Technique, Theory, Aural, Sight-reading, Rhythm, Performance |
| Skills | Discrete competencies inside a domain, tied to a level and (optionally) an subject. | "Scales & arpeggios for Grade 2", "Read bass clef" |
| Repertoire | Your school's piece library, by subject and level. Teachers assign pieces to students and track them from Assigned → Learning → Polishing → Performed. | "Für Elise — Beethoven (Grade 3)" |
| Badges | Milestones awarded manually or automatically by rule. | First practice, 7-day practice streak, 10 pieces performed, 25 skills mastered |
The fast way: import a preset
Click one of the preset buttons — ABRSM, RCM, Trinity, or Rockschool — and Spoteca imports a complete graded system (levels, domains, skills and starter badges) in seconds. Everything stays fully editable, and importing twice never duplicates items. Start from the preset closest to how you teach, then rename, delete and add to make it yours.
Building manually
- Levels tab — add each stage ("Grade 1"…). Leave subject blank to apply to all subjects, or create subject-specific levels.
- Domains tab — add areas like Technique or Theory (with an optional icon).
- Skills tab — add skills inside a domain; optionally pin to a level and subject.
- Repertoire tab — add pieces (title, composer, subject, level).
- Badges tab — create badges. Rule-based badges award themselves: first practice, practice streak (N days), pieces performed (N), skills mastered (N). Leave the rule empty for manually-awarded badges (e.g. "Grade passed").
Where exams and student progress actually live
This tab is the library — it defines what your school teaches. No student appears on it. Applying any of it to a person — ticking skills, assigning pieces, awarding badges, setting a practice goal, recording exams — happens on that student's Progress page: Students → ⋯ More → Progress on the student's row.
Exams & assessments lives at the bottom of that page. It records both the exams your school sets and the ones a student sits elsewhere — useful if you prepare students for exams at their own school. Two things are asked, independently of each other: who sets it (We set it, or Their school with the school named) and when it is — a future date is a plan, a past date is a record. Status follows by itself: planned until there is a result, then done; only Missed it is set by hand. Use Edit to fill in the grade afterwards, as words, as a number with the mark it is out of (16 / 20), or both.
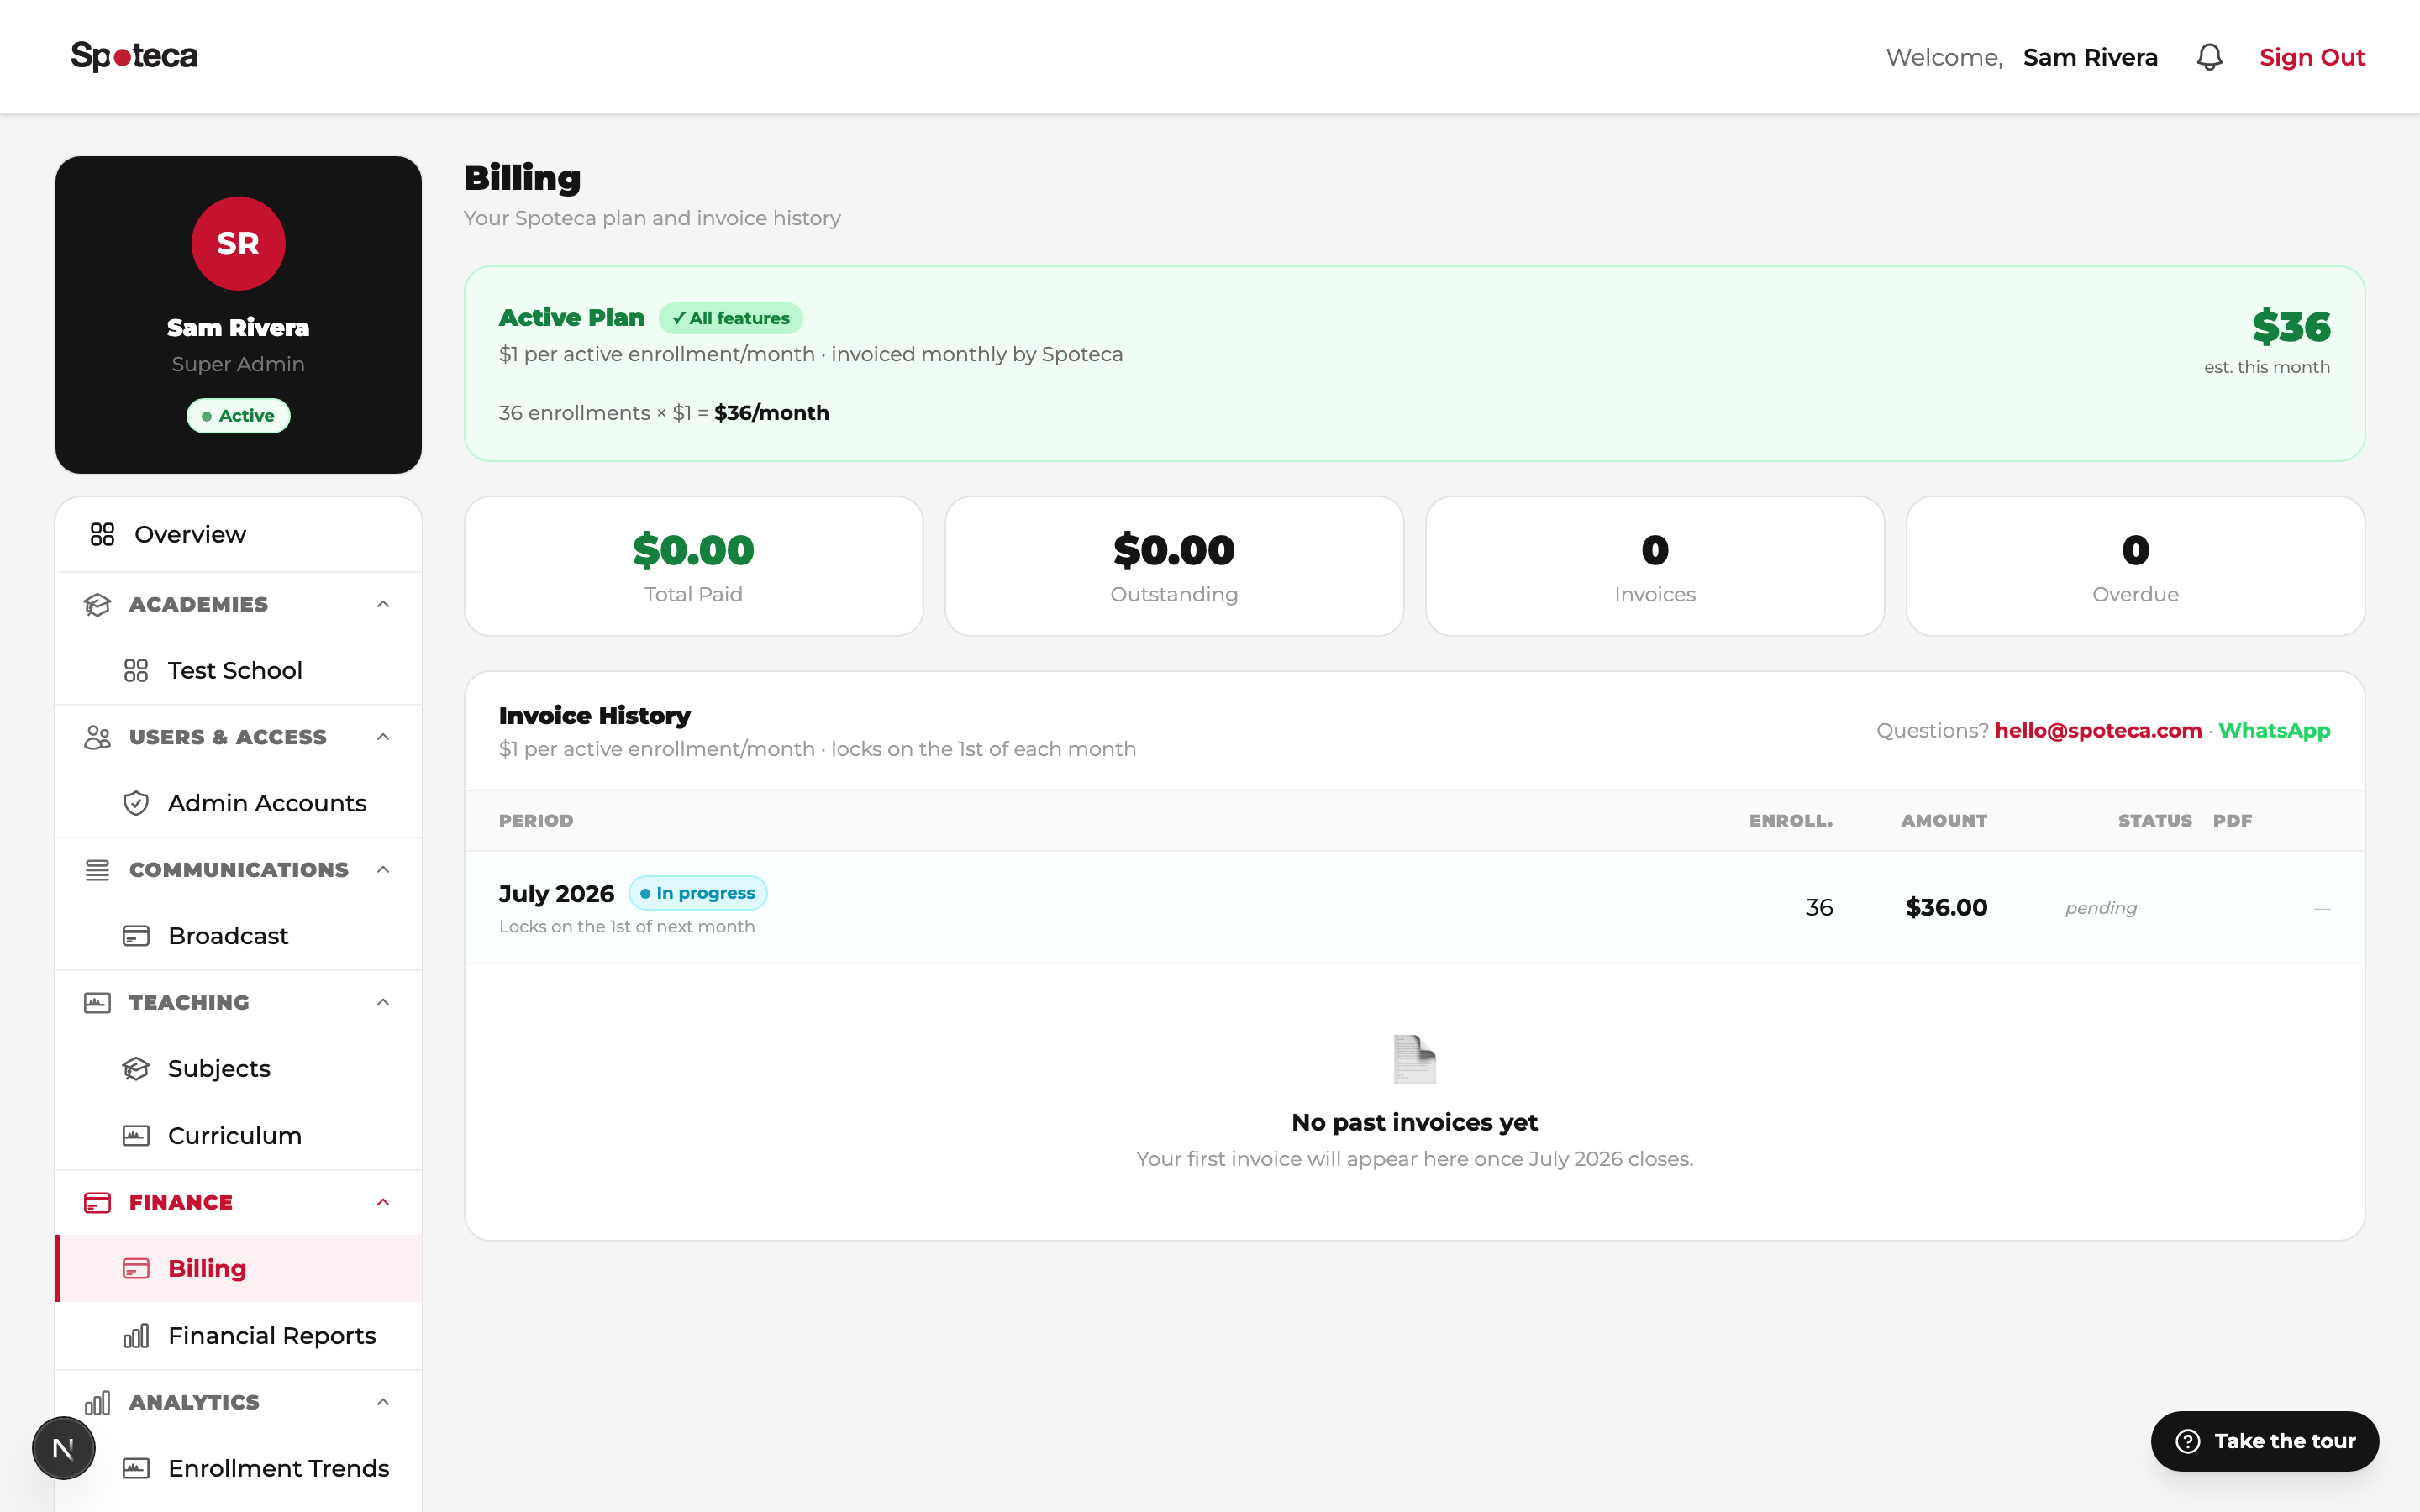
11 · Your Spoteca plan & billing
Sidebar → School Settings → Billing
| Plan | Cost | What it means |
|---|---|---|
| Free | $0 | Every feature, up to 10 enrollments a month. No time limit, no card. A month at 10 or fewer is never invoiced. |
| Growth | $1 per enrollment a month, capped at $100 a month | Above 10. An enrollment counts for a month when it has at least one lesson that month — one per individual enrollment, one per student in a group class. Whether you invoiced it makes no difference, and an enrollment with no lessons is not counted. |
Seeing exactly what you are paying for
On the Billing page, the month in progress carries a “What am I paying for?” link. Open it and you get every counted enrollment for that month: the student, the subject or the class name, whether it is an individual enrollment or a place in a group class, and how many lessons made it countable.
A program counts one enrollment for each lesson it contains: a program of three individual lessons and two group classes counts five, exactly as it would if you had enrolled the student in each separately. Bundling lessons into a program never changes your Spoteca bill.
Two things worth knowing when you read it. A student studying two subjects appears twice, because that is two enrollments. And once your school passes 10, every counted enrollment is charged — not only the ones past ten — up to the $100 monthly maximum.
The free trial
The first month your school teaches more than 10 enrollments is free, and so is the whole month after it — whatever size you reach in either. Go over 10 on 20 October and October and November cost nothing however many you end with, and you're charged from December. Only enrollments that actually had a lesson in the month are counted, so enrolling students for a later term costs nothing until you teach them. Two free months per school. Signing up on the paid card simply starts them at signup rather than waiting for you to cross 10 — and if you never pass 10 during that period, you haven't used them: they wait for whenever you do. After them, if you're back at 10 or fewer you pay nothing anyway; if you're still above 10 you simply move to the Growth plan. Your account is never suspended for growing — nothing is locked and nothing is deleted.
Paying on time
- Each invoice is due in 14 days; a reminder is emailed after 7.
- Unpaid after that, the school becomes Past due: everything stays readable, but changes are switched off until it's settled. You and your admins see a banner explaining why; your teachers, students and parents only see a note to contact the office — never that the school owes money.
- Questions about a Spoteca invoice: support@spoteca.com.
12 · Analytics & reports
- Enrollment Trends Analytics → Enrollment Trends — new sign-ups, dropouts and growth over time.
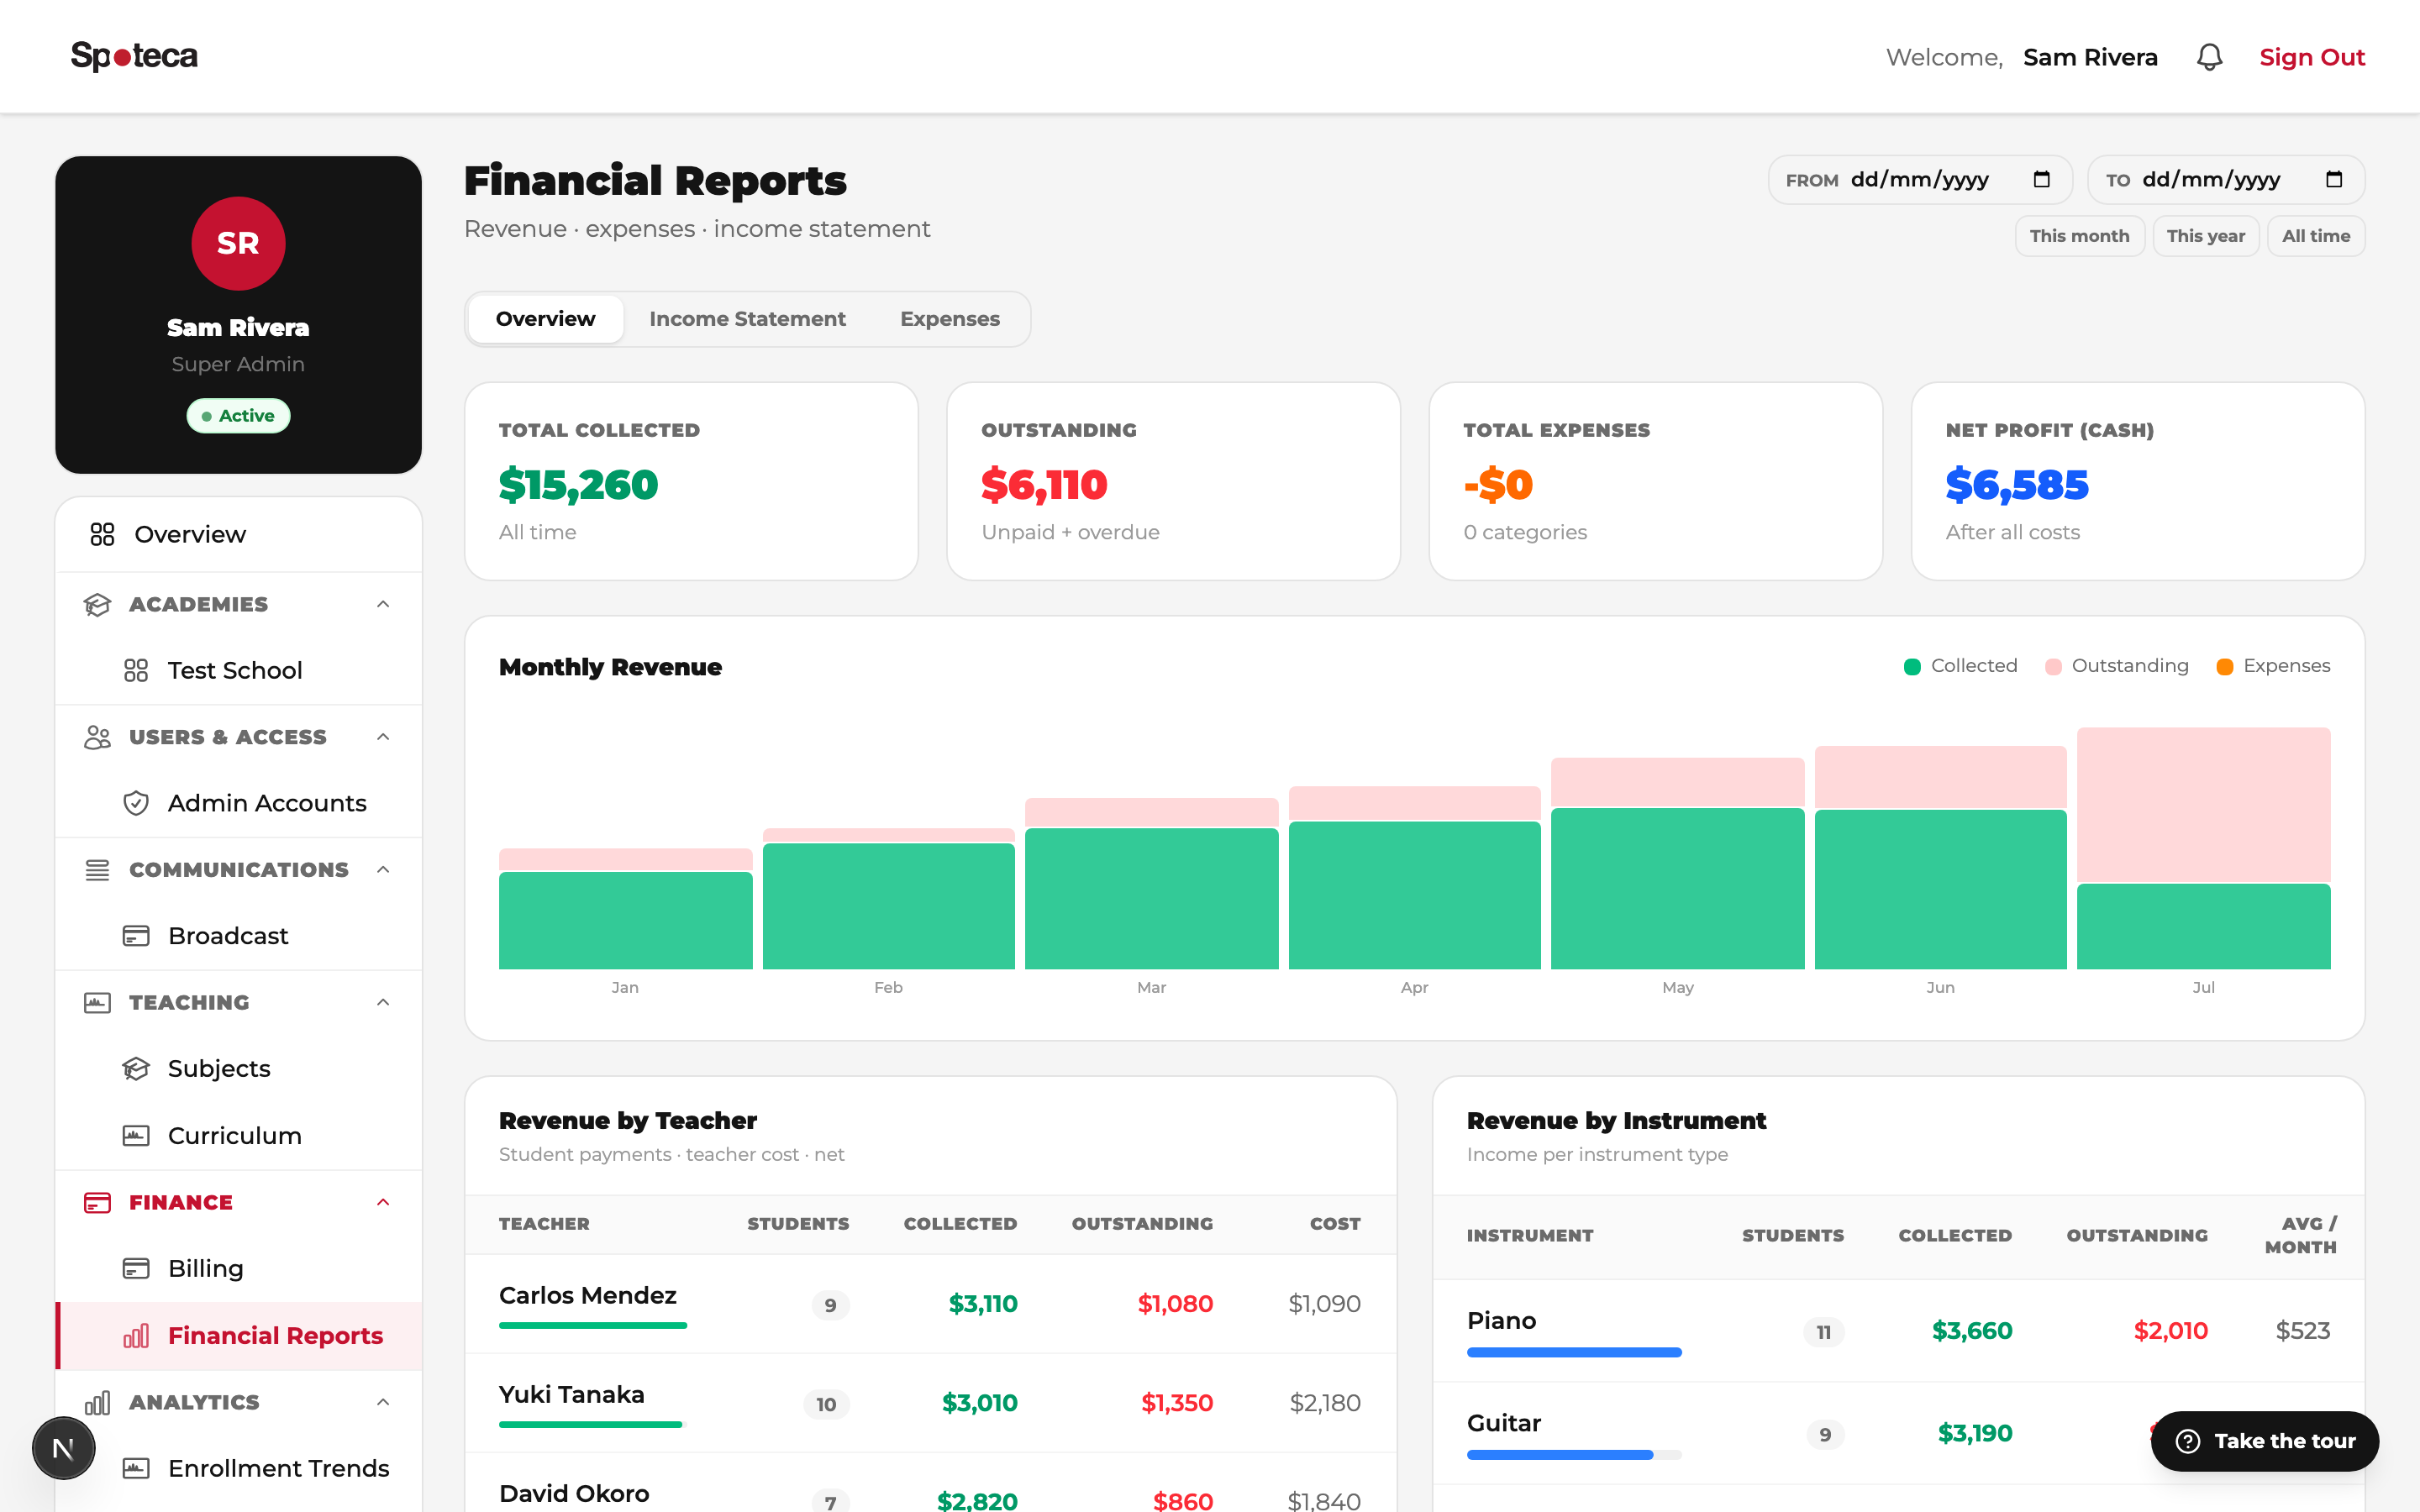
- Financial Reports Analytics → Financial Reports — monthly revenue, teacher payroll totals, expenses and margin. At the top sits a Billing health card: it's green when every due invoice has been generated, and turns amber to list any enrollment, per-term plan or group class whose invoice is still missing — with a Generate now button to create them on the spot. Invoices normally generate automatically on the daily billing run (and back-fill any month a run ever missed), so this is just a safety net you can glance at.
- Teacher Performance — what each teacher actually did: lessons given, registers taken (with any past lesson they never marked), lesson notes written out of the lessons that needed one ("7 of 9 · 2 missing"), and their own absences — school closures aren't counted against anyone — plus what they've been paid and are owed. Open a teacher's row to see their students' attendance and rating.
- Room Utilization — how busy each room is; spot dead hours and bottlenecks.
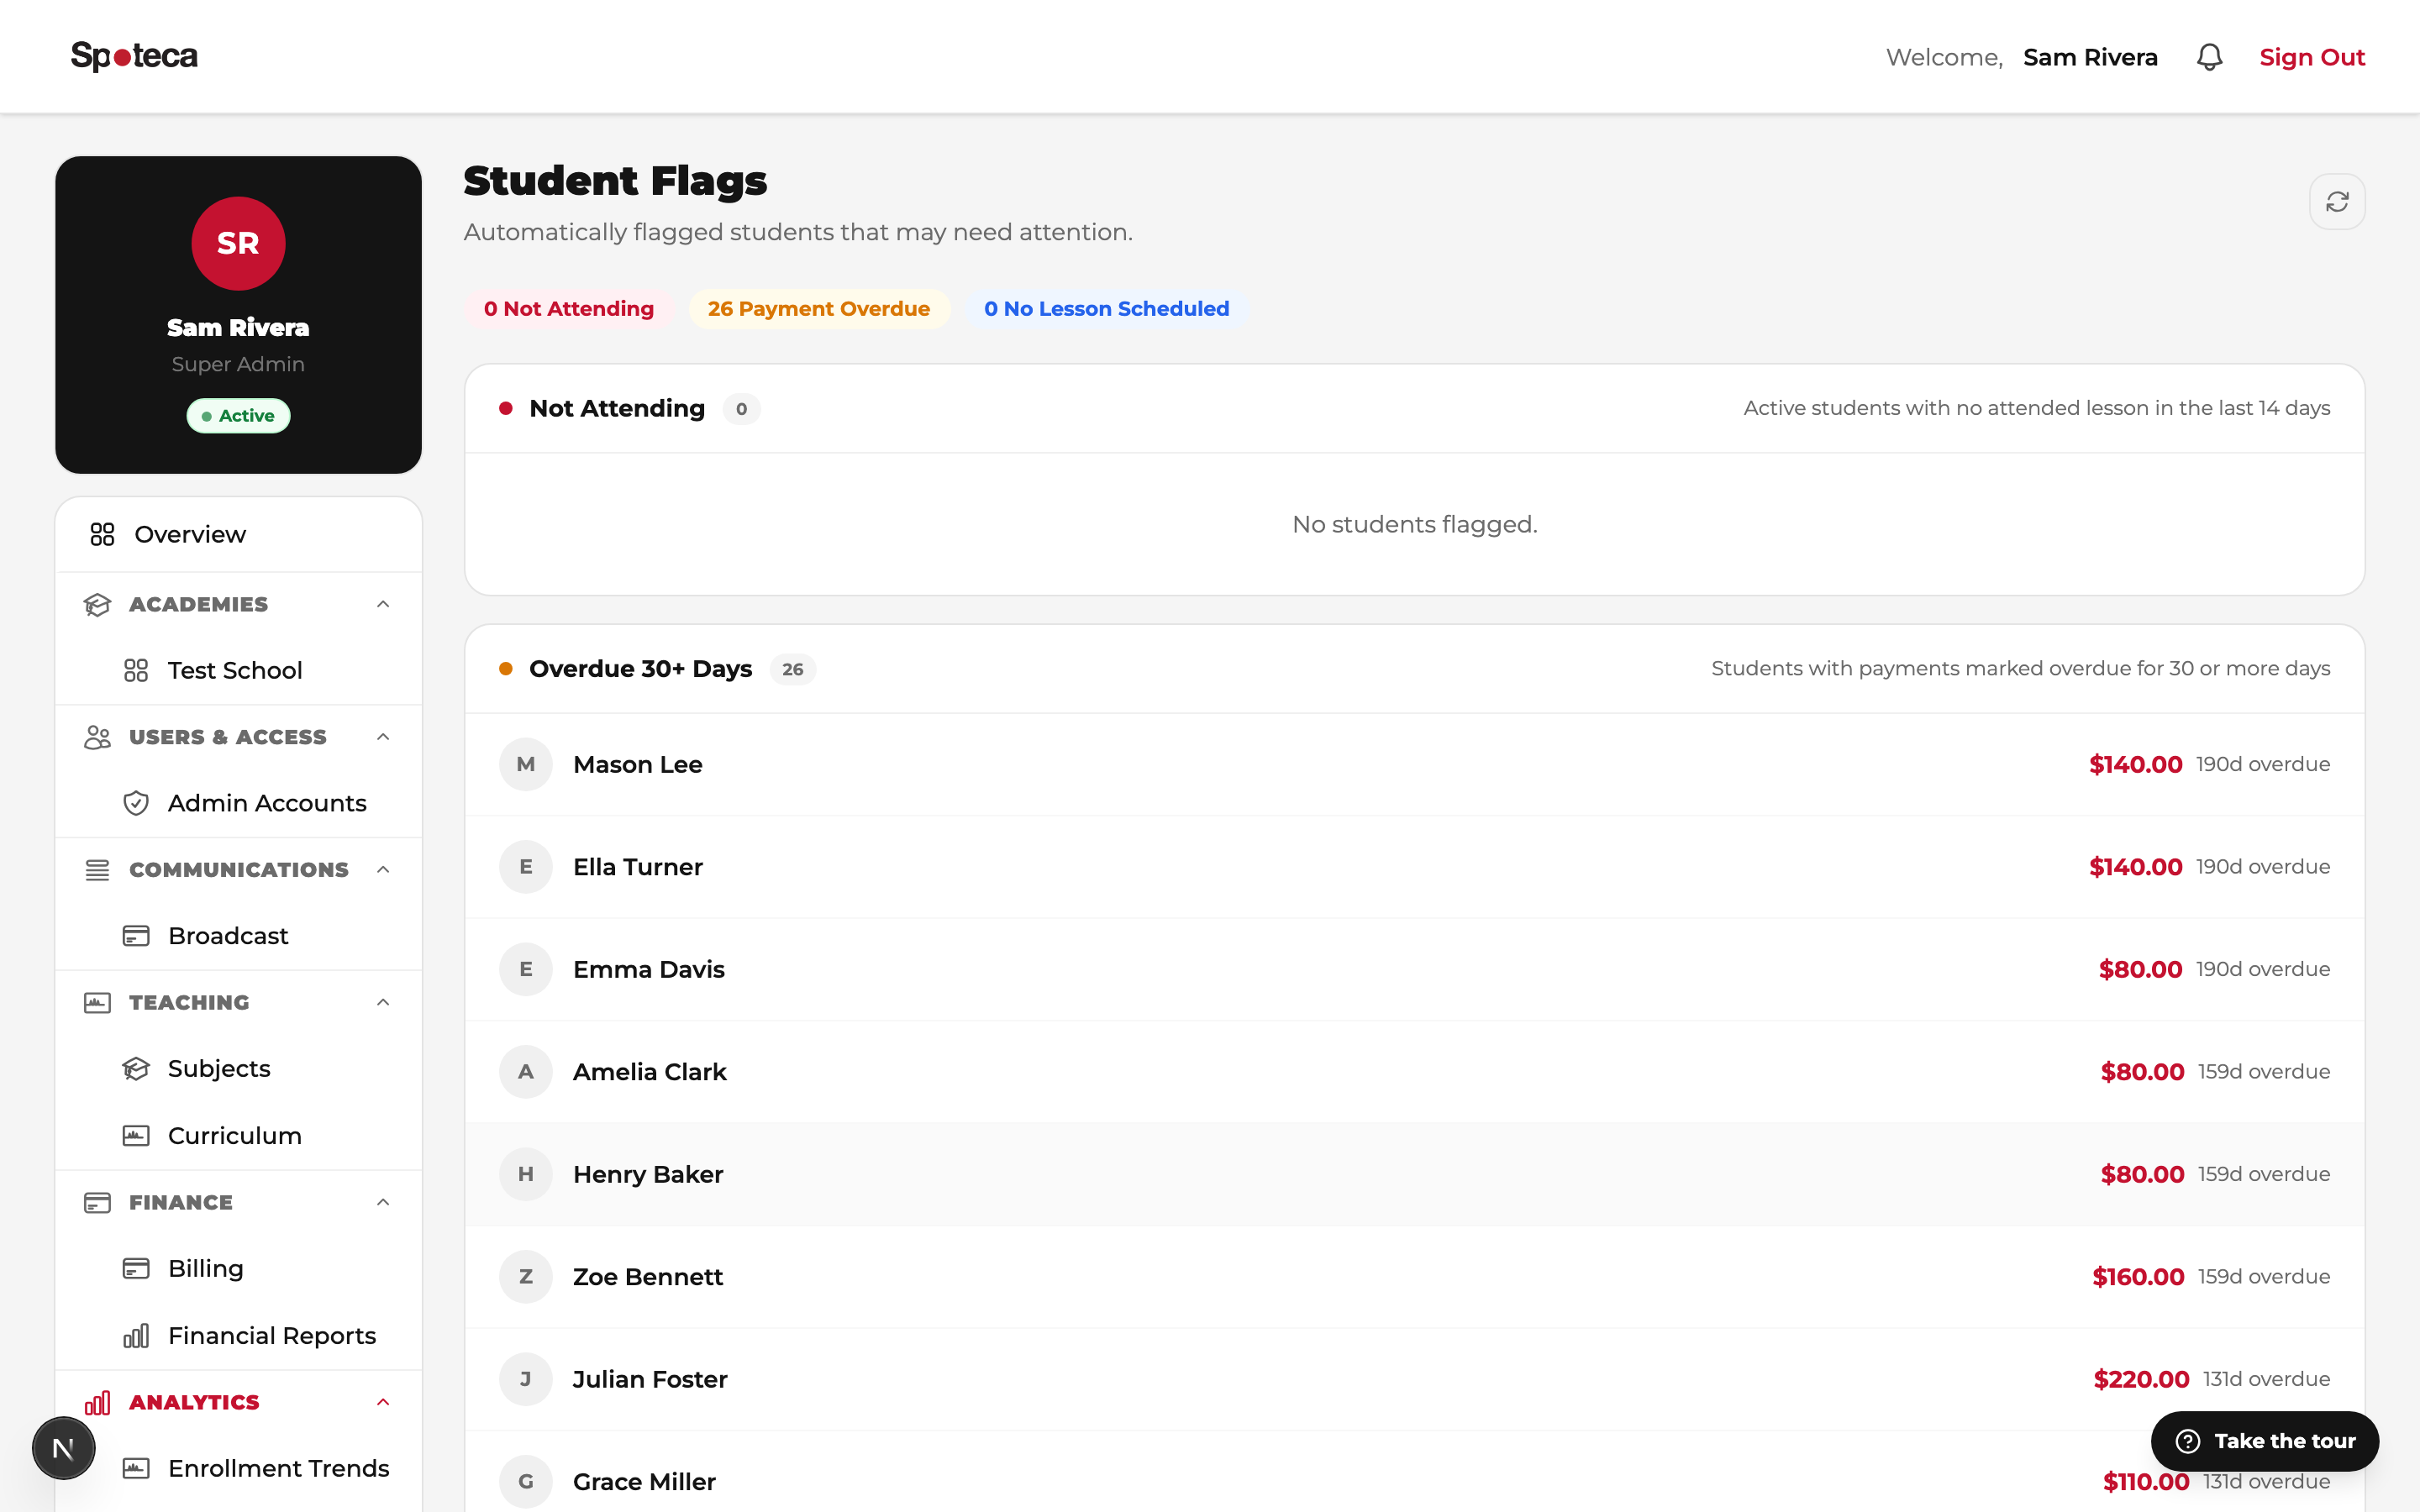
- Student Flags — Spoteca automatically flags students with overdue payments, recent absences, or no upcoming lessons, so nobody slips through the cracks.
13 · Broadcast & audit log
Broadcast Sidebar → Broadcast — send an announcement to the whole school, all teachers, or all students at once (holidays, recitals, policy changes). Recipients see it on their dashboard and in notifications.
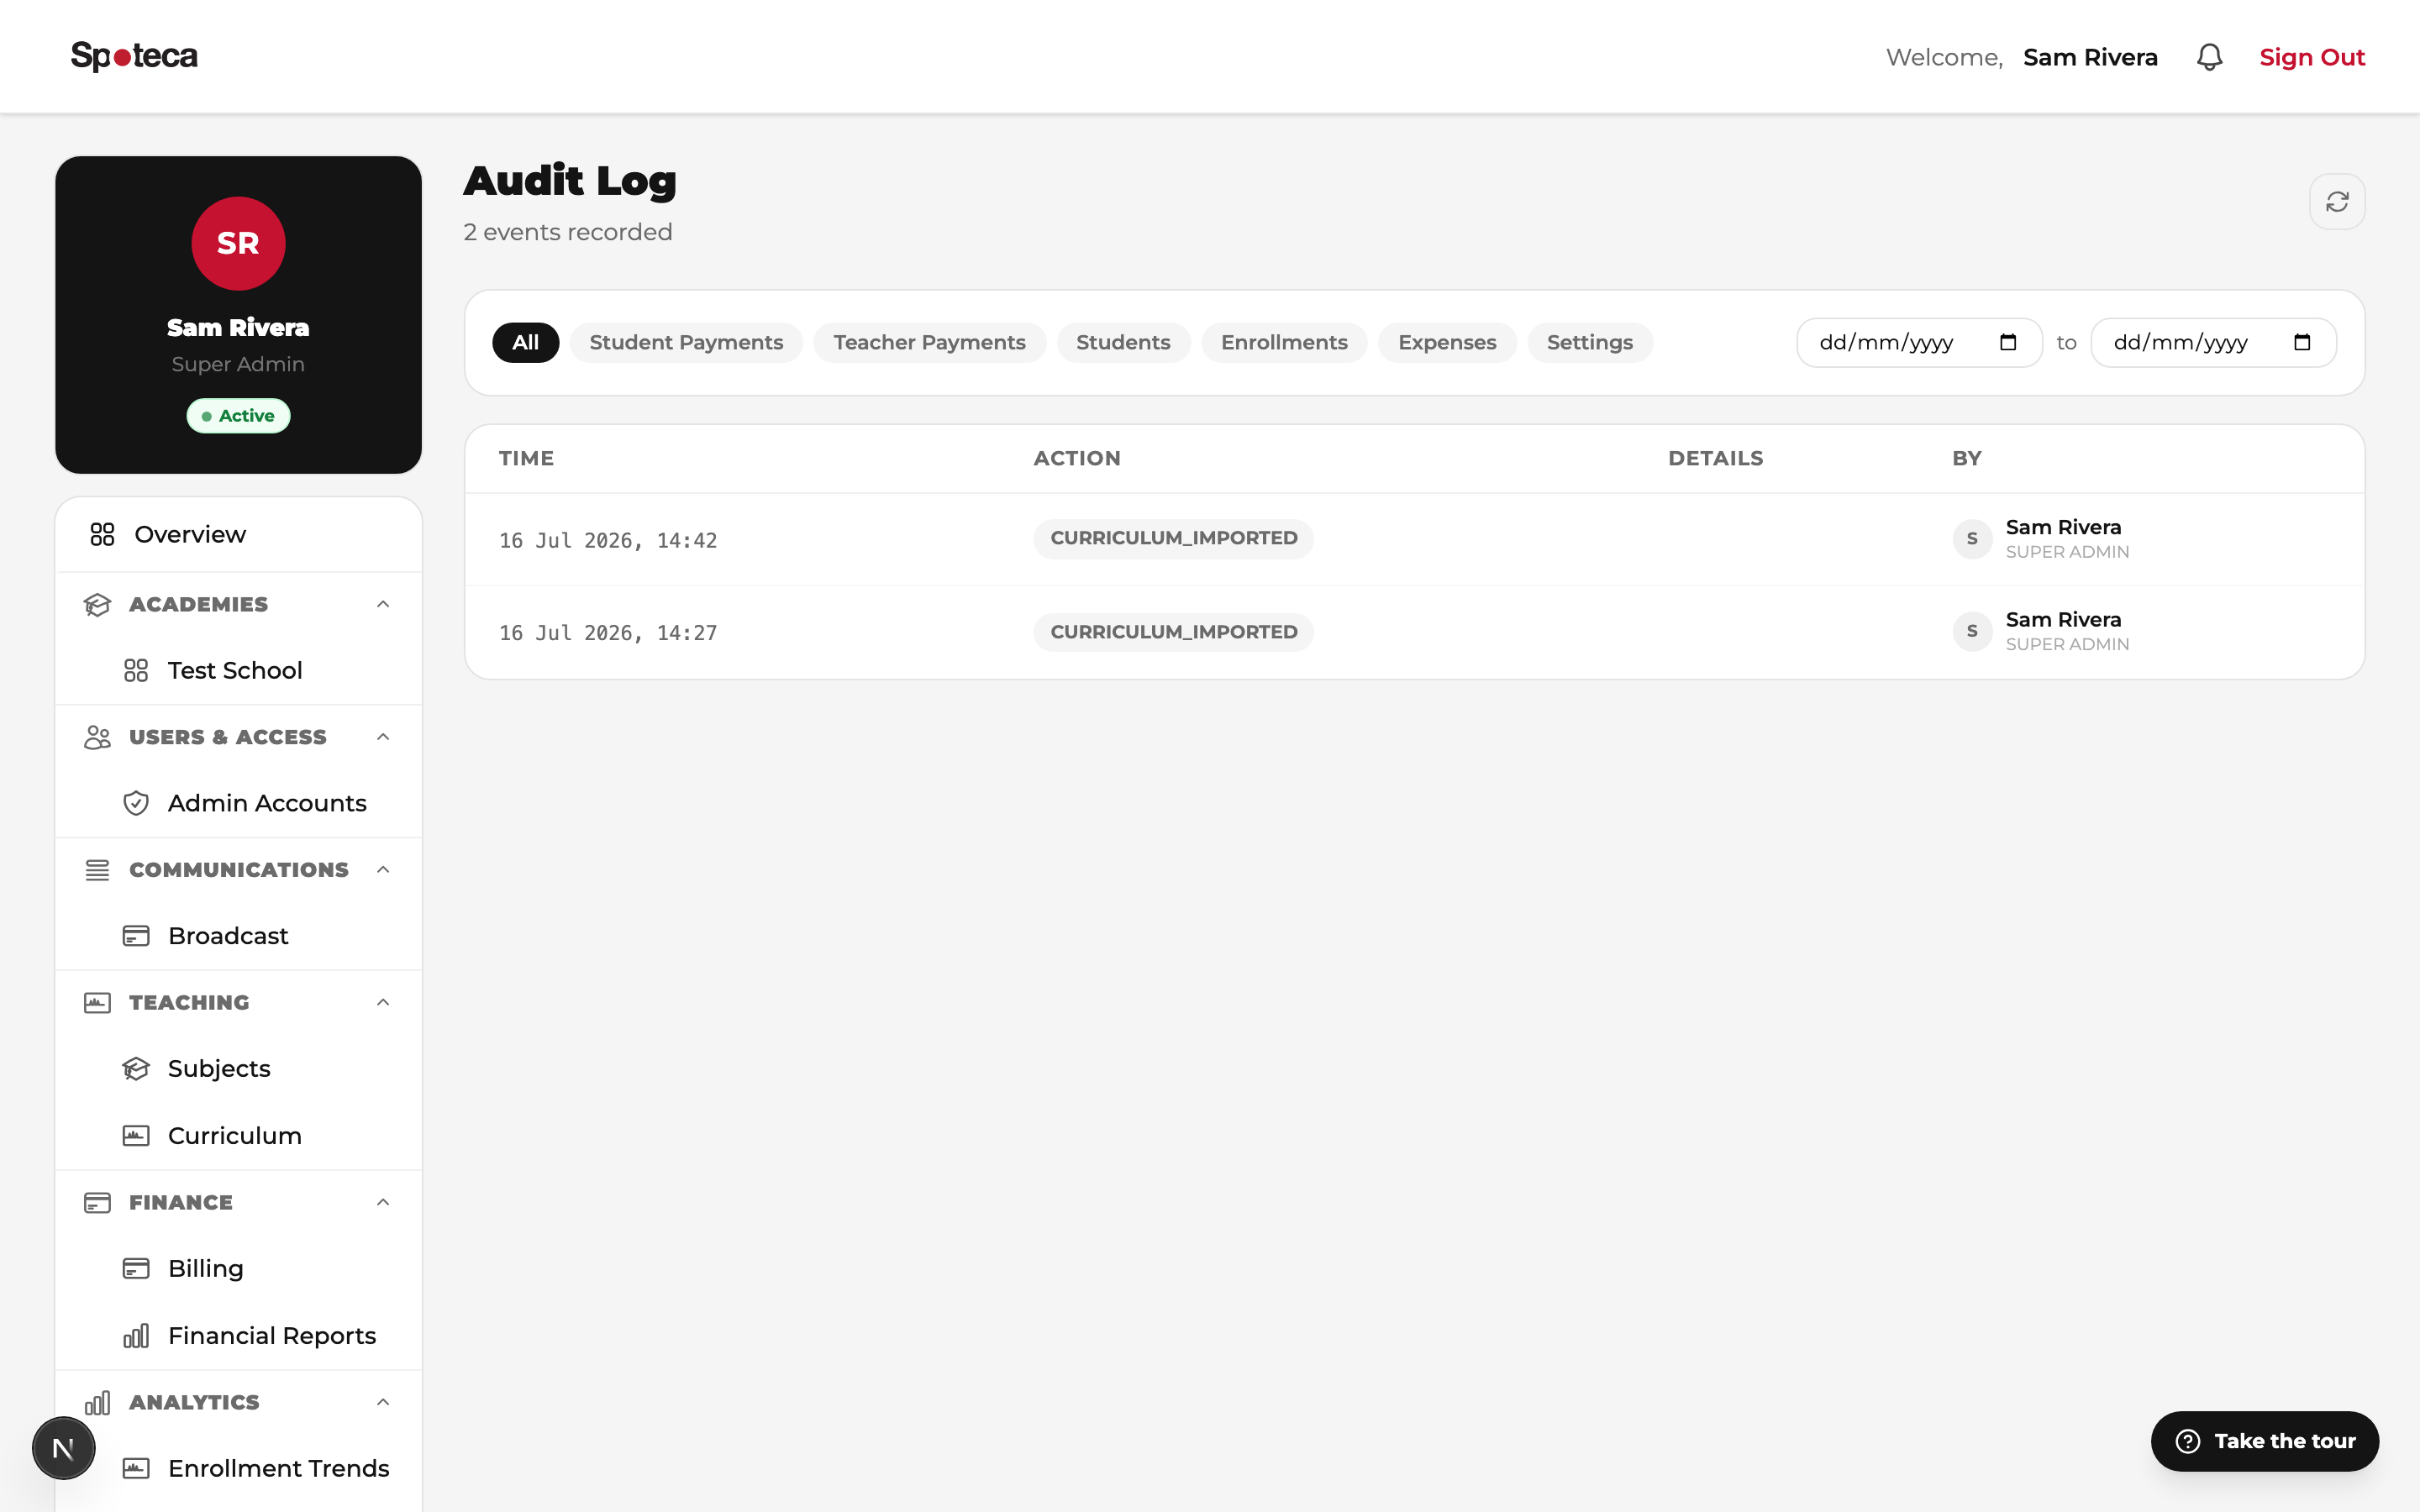
Audit Log School Settings → Audit Log — every important action (payment marked paid, student created, enrollment removed, setting changed) is recorded with who did it and when. Your accountability layer.
14 · Your account, deleting & help
My account
Sidebar → School Settings → My account — your own name, email, phone, address, photo and password. Changing your email asks for your current password and sends a confirmation link to the new address; nothing changes until you click it. Your username can't be changed.
Deleting a student or a teacher
Only you can permanently delete, from the student's or teacher's menu in the Admin view — and it's meant for accounts created by mistake. A student who was ever enrolled or invoiced can't be deleted: invoices are records. Use Deactivate instead; billing stops and history stays.
Ask AI — and what your people ask it
The ? button opens Ask AI, which answers questions about Spoteca in each person's language and can see your school's setup (open days, teachers and their availability, plans, classes — never records or payments). Analytics → Ask AI Questions shows every question your staff, teachers and families asked, so you can spot what confuses them. A 👎 under an answer reaches the Spoteca team.
FAQ
What must I finish before my staff can work?
Subjects and at least one pricing plan — those are the hard requirements. Then add teachers and get their availability set. The curriculum can wait: enrollment works without it, but Journey pages stay empty until it exists.
Can I change the portal URL (slug) later?
Write to support@spoteca.com — changing it affects everyone's login links.
What happens when I go above 10 enrollments?
Nothing stops. The first month you teach more than 10 is free; after that you pay $1 per enrollment a month, never more than $100. See Billing.
Can I run multiple branches?
Yes — each branch is its own school on Spoteca, billed per branch. Write to support to link them.
I own the school and also teach. Two accounts?
No — see Teaching here yourself. Use I teach here too and switch views with one login.
Why can't I untick a weekday?
Classes are still booked on it. The message lists them; move them to a day you stay open, then untick it.
Next → The Admin Guide: teachers, students, scheduling & payments